We all know the power of WordPress when it comes to functionality and this CMS has given us unlimited opportunities to build custom websites with custom designs and features. But it is also true that WordPress is a highly security vulnerable free Open Source CMS and can easily be hacked by hackers regardless of what security we implement to save it from malwares.
WorPress core is still securer but we have to use several themes and plugins developed by anonymous developers across the world and we are almost completely unaware of possible security issues with those themes and plugins. Even great developers sometime failed in terms of security – for example big boy Themepunch (developer of Revolution Slider and Showbiz Slider) delivered vulnerable versions of its products in January to March 2014 and many websites got hacked because of that vulnerability. However, later this vulnerability was fixed by developer. Here we just want to emphasize the point that any WordPress theme or plugin may be vulnerable at any time and there is no guarantee for 100% security.
Now the only thing that would be flashing across your mind is: “what to do now to overcome this issue?”. And the answer is straightforward. All you need is to keep your WordPress website fully backed up so that you may restore it in emergency conditions. ‘’
Here are the best free and premium resources to backup WordPress and to restore it on emergencies like hacked WordPress or accidental file deletion. We have picked up and reviewed many WordPress plugins and finally written this guide reviewing two best among them.
Backup Plugins Comparison
We have have compared the backup speed for BackupBuddy and UpdraftPlus (backup size near about 300mb)
- Backupbuddy – took 50 seconds to finish back and 49 seconds to send it to remote destination
- UpdraftPlus – took 40 seconds to finish the backup and 1 minutes 56 seconds to send it to remote destination
[go_pricing id=”backup_plugins”]
Editors’ Choice – BlogVault

BlogVault is an independent backup provider service for WordPress. BlogVault , for all practical purposes, is the most secure way as a backup plan for WordPress. Unlike self hosted WordPress plugins, BlogVault doesn’t interrupt your hosting server and even more you don’t have to look for a 3rd party cloud storage service to save backups. BlogVault can handle it all. BlogVault silently keeps working to back up your WordPress website on a daily basis. The cherry on the cake is BlogVault’s innovative instant backup feature which is very refreshing and reassuring . With instant backup, you don’t lose even a single change made to your website as BlogVault takes backup every time you make any change to the site (incremental backup).
To get BloegVault working, all you need to do is add your website URL to BlogVault panel and installing a small plugin given by BloegVault. From the very first moment you activate the plugin, BloegVault starts taking the backup of your website automatically and no further configuration in WordPress panel is required.
With the help of BlogVault, it is very easy to transfer WordPress from one to another server . Usually, transferring a large size WordPress may become a big hassle or shall we say a nightmare, no matter how you get it done: either you process the whole migration manually or via a self hosted plugins such as BackupBuddy or UpdraftPlus. Unfortunately the self-hosted backup plugins are fully dependent on the server CPU and at times especially when the backup/migrating files have a size of GB, these plugins may well fail to accomplish the task. BlogVault will never let you down because it can seamlessly take the backup of large websites as well as the transfer between the servers without any hassle.
One of the most appealing features of BlogVault is its incremental backup feature. Instead of taking full backup BlogVault takes incremental backup when you make small changes to your website. If something goes wrong, you can happily roll-back the changes, restoring an incremental backup. Hackers always look forward to the opportunity to mess with your WordPress. With BloegVault incremnetal backup feature, you can revoke the changes made by hackers without any problem.
Blogvault Test Restore
Especially for the developers, test restore is an excellent thing. For instance, you are working on a developmental site and you happen to make a mistake that may ruin your all your hard written code. You have several backup copies but you are not sure which one should be restored. In that case you can deploy the restore on to Blogvault server that is called the test restore. With this test restore you can see what the restored websites look like. If you are satisfied with the test restore you can deploy it on to your live site.
Salient Features of BlogVault
- 30 days backup history
- One Click restore
- Auto restore
- Instant backup on changes
- Test restore on BlogVault servers
- Dropbox upload (optional)
- Easy server migration
- Shared hosting friendly
UpdraftPlus
Updraft Plus is one of the best free plugin that can be used to backup or migrate WordPress from one to another web host. However its features are limited in free version but sufficient enough to take site backup automatically. You can set daily,weekly and monthly backup. Besides these scheduling options there are options to set backup to run at every 4 hours, 8 hours, 12 hours and fortnightly. However you can’t select time to run backup in free version. And another restriction is that free version can backup only wp-content folder not WordPress core files. However, if your WordPress gets hacked it would be better to install fresh core files, downloading WordPress from wordpress.org/download
How to use Updraft Plus in the best way
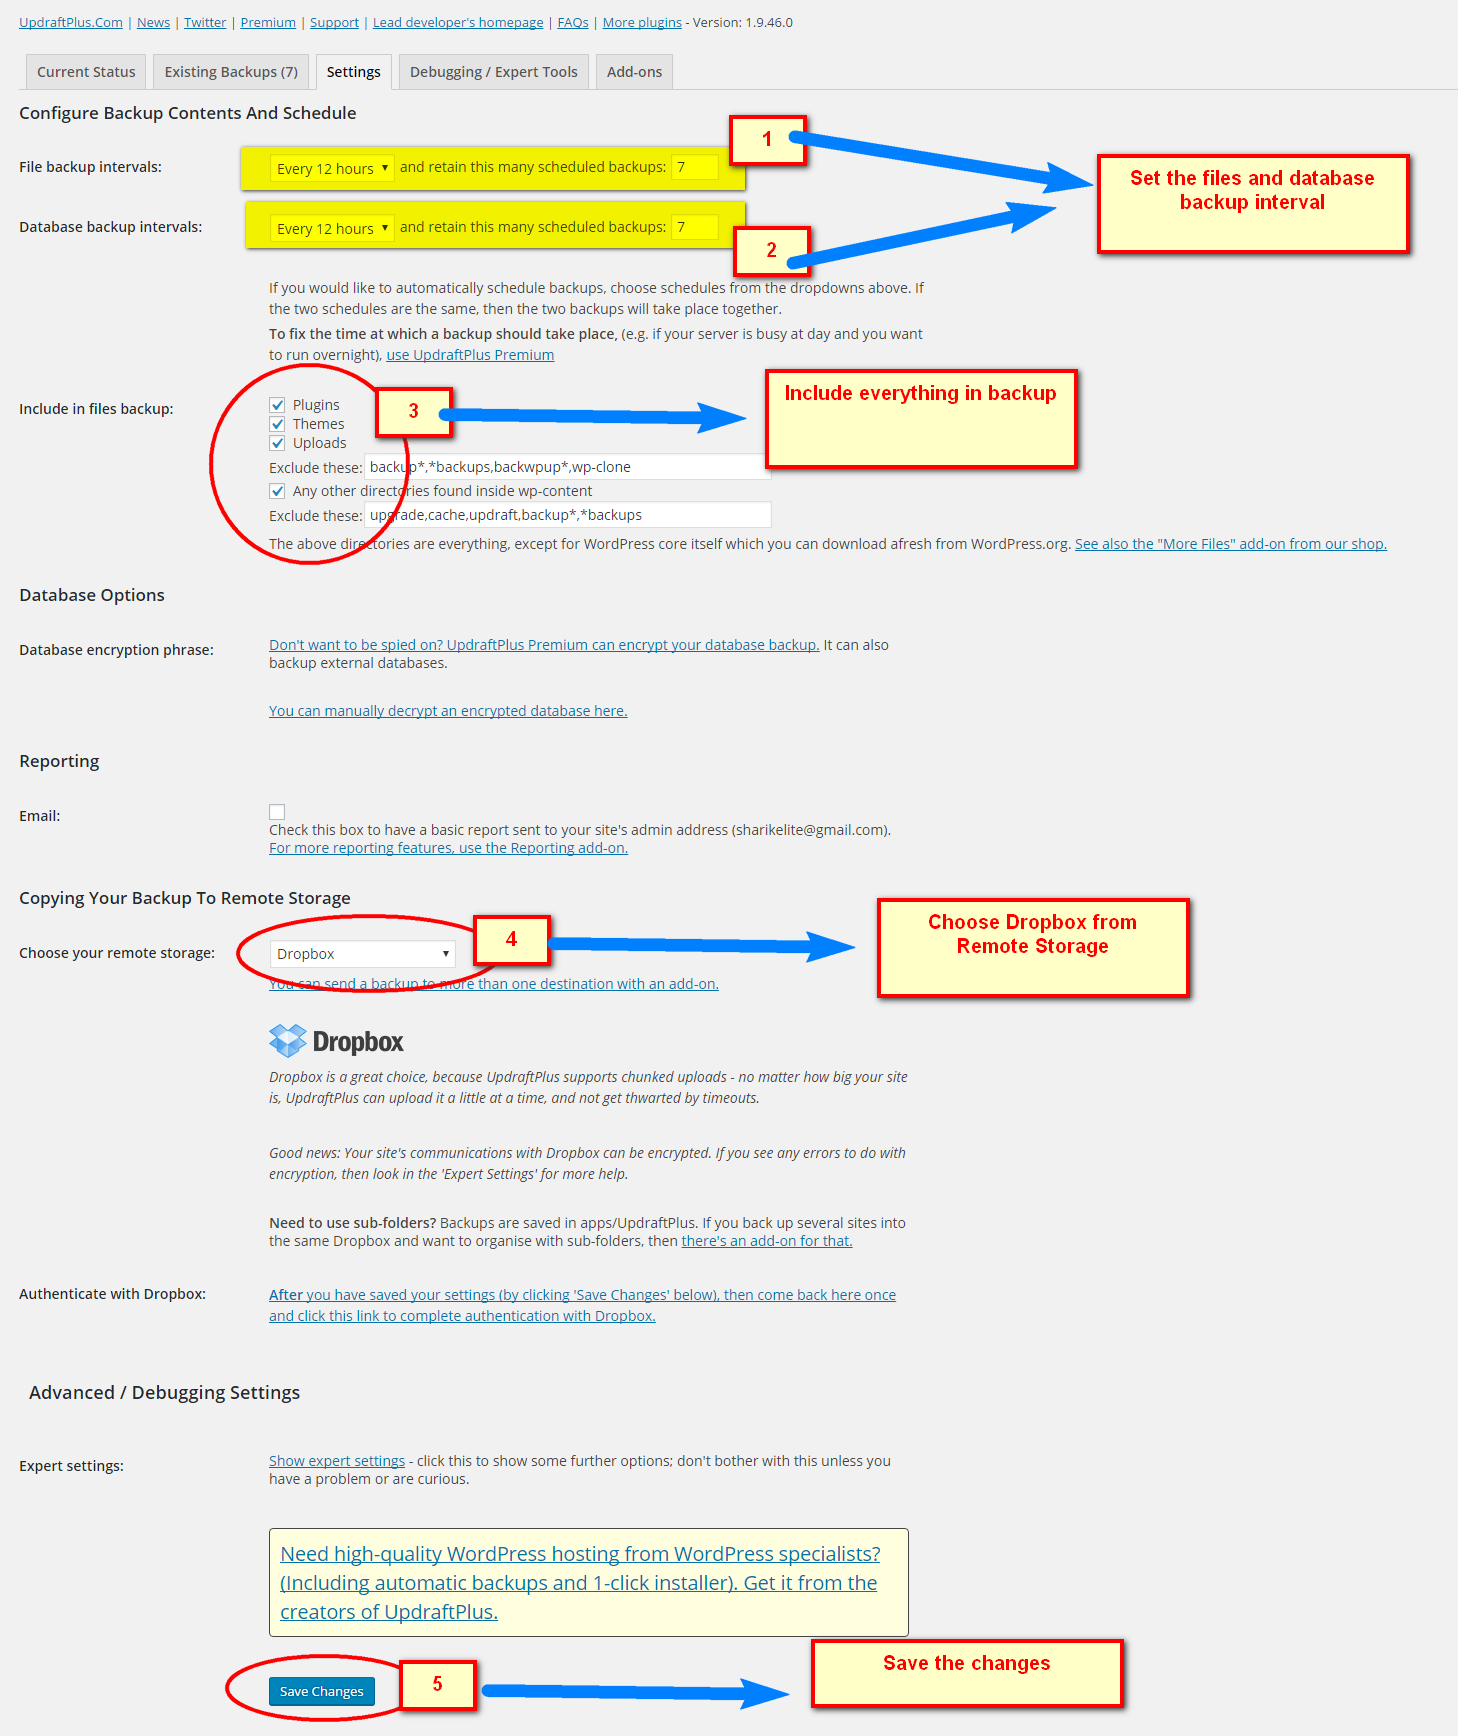
On Updraft Plus setting page, set the backup interval according to update frequency of your website. For example if your site gets updated hourly then you should select update interval every 4 hour or accordingly.
Keep Include in files backup: unchanged
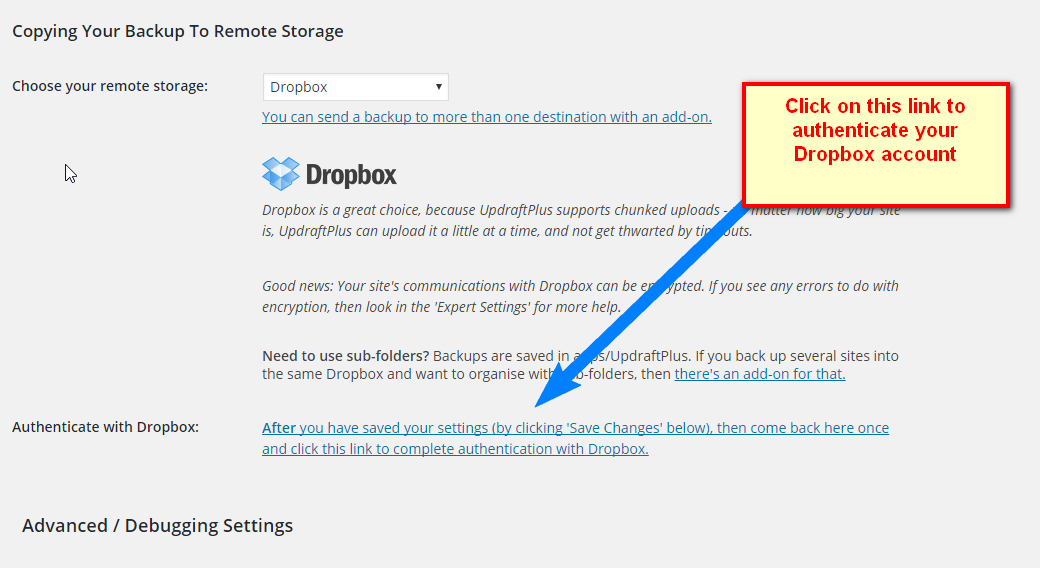
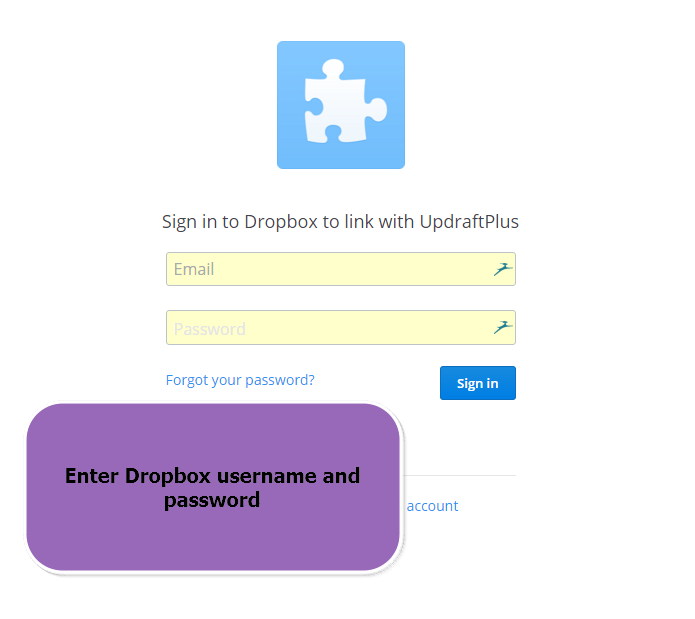
Copying your backup to remote storage – This option is very important. You must save your backups in a place that is outside your hosting account. You can choose from various given options; such as Rackspace Cloud, Amazon S3, Google Drive, Dropbox, FTP etc. I will recommend you to use Google Drive if you don’t have a paid cloud storage account with Amazon or Rackspace.
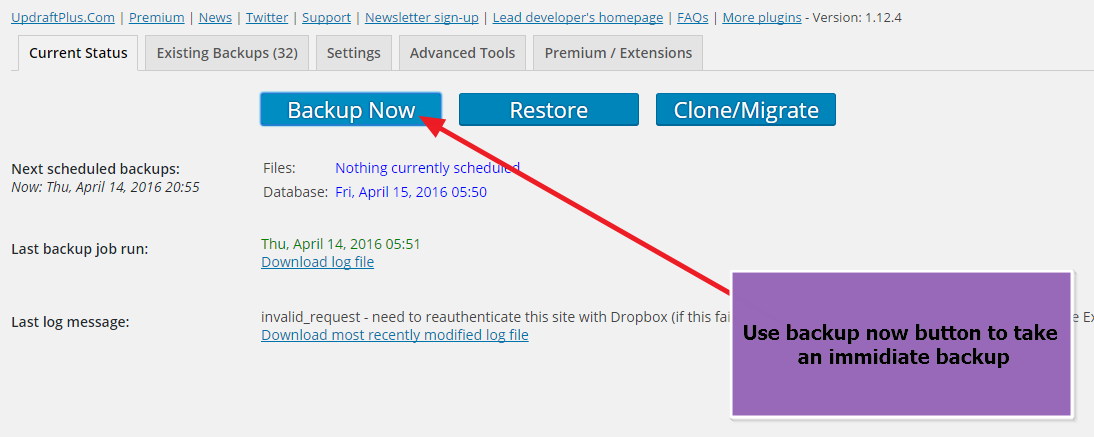
After completing setup of the plugin, you should run Ist backup manually using “Backup Now” button that was on “Current Status” section
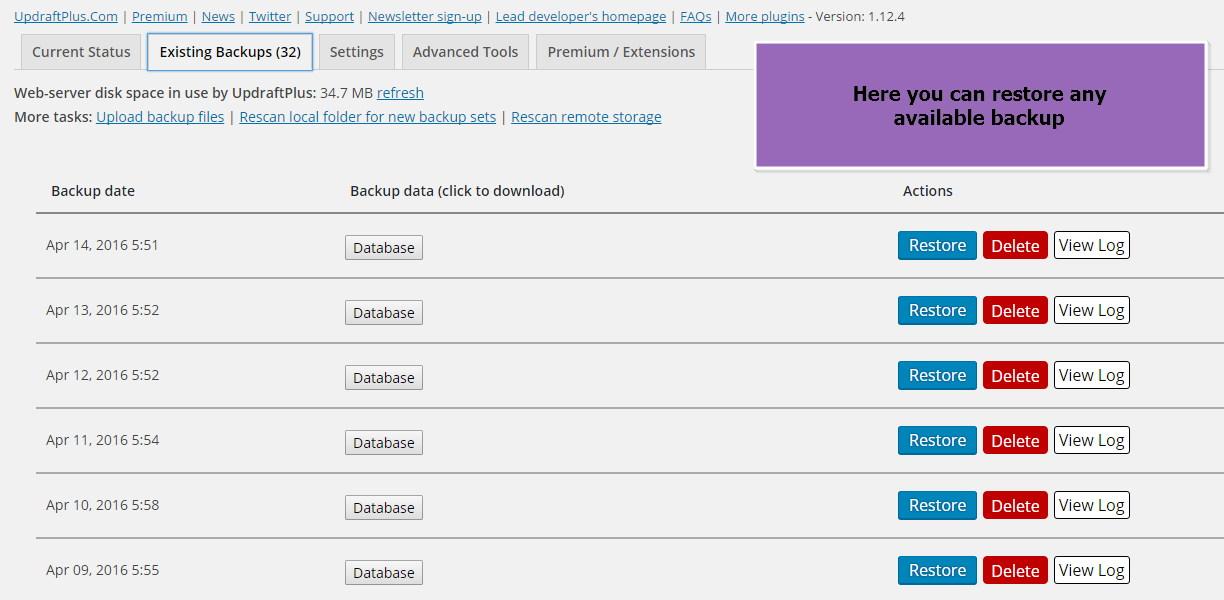
You can manage all your backups on Existing Backups tab. You can download backup from here or you can also restore backup, using Restore button. When all your files in wp-content folder are restored and database is replaced with backup files. However you are free to choose which component is to be restored; Themes, Plugins, Uploads, Others (other files in wp-content folder) and Database.
How to restore Updraft backup in emergency needs
There are two components of your WordPress that can’t be recovered if you don’t have a backup copy;
- Database ( heart, brain or almost everything of your WordPress)
- Your uploads ( files in your WordPress upload folder – wp-content/uploads), usually images uploaded to WordPress media library
If you can access your WordPress dashboard, you can use Restore button to restore backup easily
If your website is damaged and you can’t access WP dashboard;
- download latest backup copy from Cloud where you store backups.
- Now Download WordPress latest version from wordpress.org/download and extract it on your PC
- Now upload all files from download package except for wp-content folder
- Configure wp-config.php using your WordPress database detail
This process makes your WordPress dashboard working and then you can easily restore database and other backup files with the help of Updraft Plus “Restore” Button
Note– If you are unable to restore backup using “Restore Button” for some reason, you need to restore database using phpMyAdmin. To Download Database to your PC, Go to Settings > Updraft Plus > Existing Backups > Click on Database Button of the Backup whose database you want to download. Then Updraft Plus makes database available for download and a new option appears “Download to your computer”.
Now you can restore this downloaded database zip file using phpMyAdmin. If your database is larger than 50MB, probably there are many shared hosting that will not allow you to restore it via phpMyAdmin. Don’t panic if you are stuck here. All you need to do is upload this file to your hosting root directory and write to your hosting support to restore this dump file to your WordPress database. Don’t forget to tell your WordPress database name to support.
If you buy Updraft Plus Premium, you can migrate WordPress from one host to another or from one domain to another domain more easily.
Know how easy is to restore a website with UpdraftPlus Premium;
Take backup of your WordPress on Host A (existing host) > Transfer this Backup to Host B (new host) using Updraft Plus Remote Destinations FTP option > Setup Name Server of your Domain on Host B > Install WordPress on Host B > Upload and Restore backup on “Existing Backups” section to restore your WordPress.
BackupBuddy
BackupBuddy is an all in one suite for automatic backup and even super fast automatic restore on the same hosting account or on any other hosting. Literally BackupBuddy works like a magic wand and saves you from big hassles while transferring WordPress from one hosting to another, one domain to another or in case of damage, restoring WordPress at the same location.
The biggest different between BackupBuddy and all other Backup plugins is that only BackupBuddy offers standalone Restore Script ( importbuddy.php) that restores backup without using WordPress. This script is very fast and can restore a large WordPress website within a minute. All you need to do is upload backup archive and importbuddy.php in the directory where you want to restore WordPress.
BackupBuddy is highly optimized to work with shared hosting where recourses are limited. This plugin generates backup using batch process and imposes a minimum load on shared server. BackupBuddy and Updraft Plus are the two most efficient plugins that can backup and restore large WordPress websites on shared hosting.
How to take automatic backups using BackupBuddy
First of all, you need to set password for importbuddy.php. You can change your importbuddy.php password on BackupBuddy > Settings.
General Settings
Here you can find several other options to customize such as you can set backup archives limit, custom local storage folder etc. Even you can exclude any directory from backup creation.
Advanced Settings
Except all other options, you find a very important option here: Database Rollback Feature. With this feature you can restore database on BackupBuddy Restore Panel.
After saving Settings, go to Schedule and create a backup schedule according to your needs. Select a remote storage from given options like Racksapce. I will recommend you to keep local copies of backup too. With this plugin you can schedule backup even hourly and you can also select the time to run backup. After a Schedule is set up, backup is created automatically according to set schedule.
How to restore backup using BackupBuddy
If you delete your uploads accidently
Go to Backup Page > Locate the latest backup > Click on “browse and restore files” > Select files that were deleted and click on Restore button.
If you accidently delete your articles
In this condition you can use “Database Rollback” feature. Go to Restore/Migrate > Click on Rollback Database to restore
If your database / blog gets hacked or corrupted for any other reason
In this condition you need to restore full backup using importbuddy.php. Upload backup archive and importbuddy.php to your WordPress root and delete all other WordPress files > Now create a database in your hosting account and create a database user > Then type http://yourwordpressroot/importbuddy.php in your browser > Replace yourwordpressroot with the url of your WordPress blog > importbuddy.php will ask you for the password you set for importbuddy. After finishing authentication you need to follow a step by step wizard and you get your WordPress restored within a minute.
If you want to change domain name
When you restore your blog, BackupBuddy gives an option to change domain name or directory.

