Make your website always online using DNS failover system and never lose your valuable website traffic.
One day, all of sudden, an idea flashed through my mind: ‘Is it possible for our website to switch to an alternative server automatically, when primary server is down?” in other words if our primary server is down, the site should redirect to a secondary server where its mirror version is available and as simple as that this way the site downtime could be reduced to a minimum extent. I did a lot of research on it but found that in practical it is not that easy and requires advanced knowledge of server management. But I continued my research keeping in mind the age old saying that you can find even God, if you sincerely look for Him. And I really found a way which is not only very easy but also highly affordable at the same time.
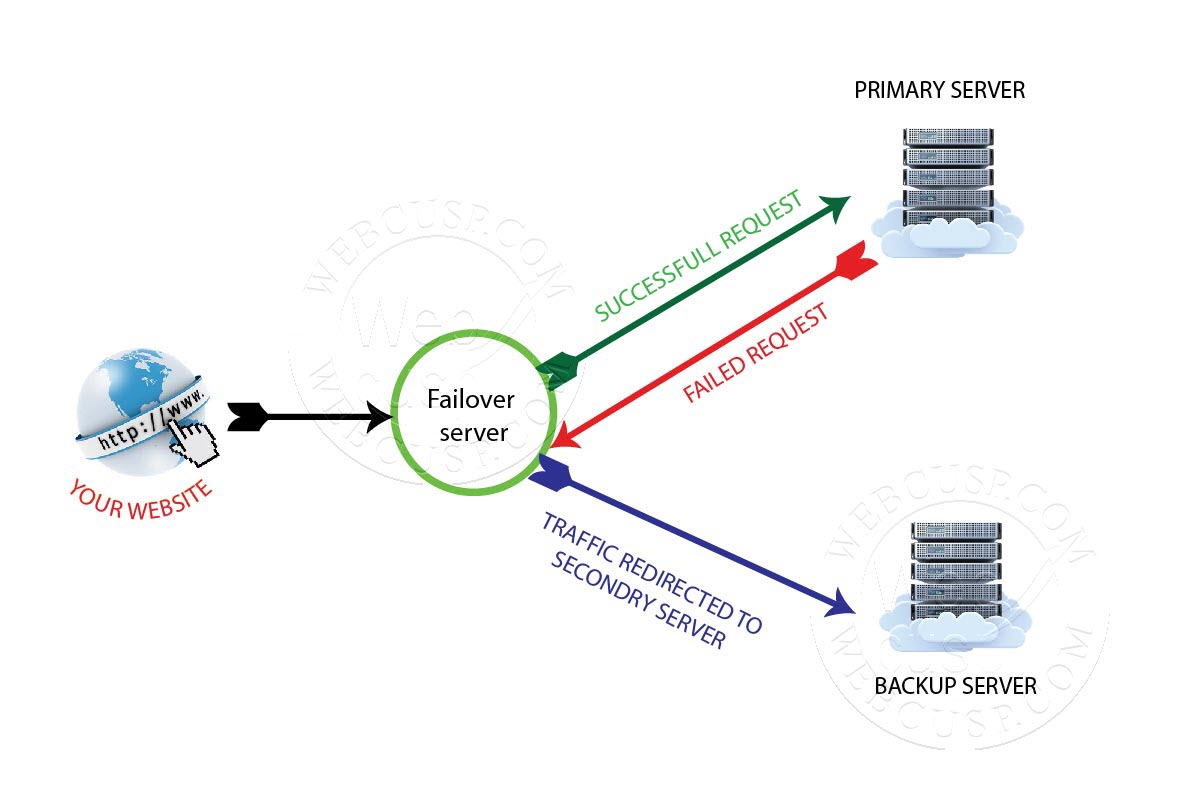
It is possible via DNS Failover. DNS Failover is a method to switch server IP automatically when your primary ( and vice versa) server is down. There are not many websites which are selling this service. I hardly found two or three websites which offer a DNS Failover service. Other than DNS Made Easy, all other services are crazily expensive including Amazon AWS ($50/month). On the other hand DNS Made Easy costs us only $29/year which is overwhelmingly cheaper and economical.
Note – Unlike other expensive and difficult to setup failover systems, it is a friendly method to setup ip failover.
This way you can update database and files on a secondary server using 2-3 clicks and point your site to the secondary server wherever you want either manually or by using DNS Failover.
If you are running a high traffic website with over 10k+ visitors per day, the use of DNS Failover service is highly recommended as the service will put an end to loss of visitors which you otherwise have to suffer due to primary server failure. One minute downtime may result in a loss of hundreds to thousands of visitors depending on the traffic volume of a website. With DNS Failover, you can happily say goodbye to this kind of visitor loss. If your primary server goes down, DNS Failover automatically points your domain to the secondary server. DNS Failover bot checks the website every minute and it swiftly switches the server IP when the site is found down.
How to sync your site between two different hosting
Read this tutorial to learn how to keep your site up to date on two server
DNS failover with Sucuri Cloudproxy
Checkout more on Sucuri Website Firewall
Note – we use Sucuri for malware protection and failover
If you are not using CloudFlare
Sucuri Cloudproxy is a comprehensive security solution for every kind of website especially Open Source CMS which are highly vulnerable to malwares. We use Cloudproxy to safeguard our blog and highly recommend it to everyone. In addition to security firewall and CDN service, Cloudproxy comes with a very valuable feature of DNS failover and load balancing
It is very easy to use DNS failover feature of Sucuri Cloudproxy.
- Add your hosting IP to Cloudproxy control panel.
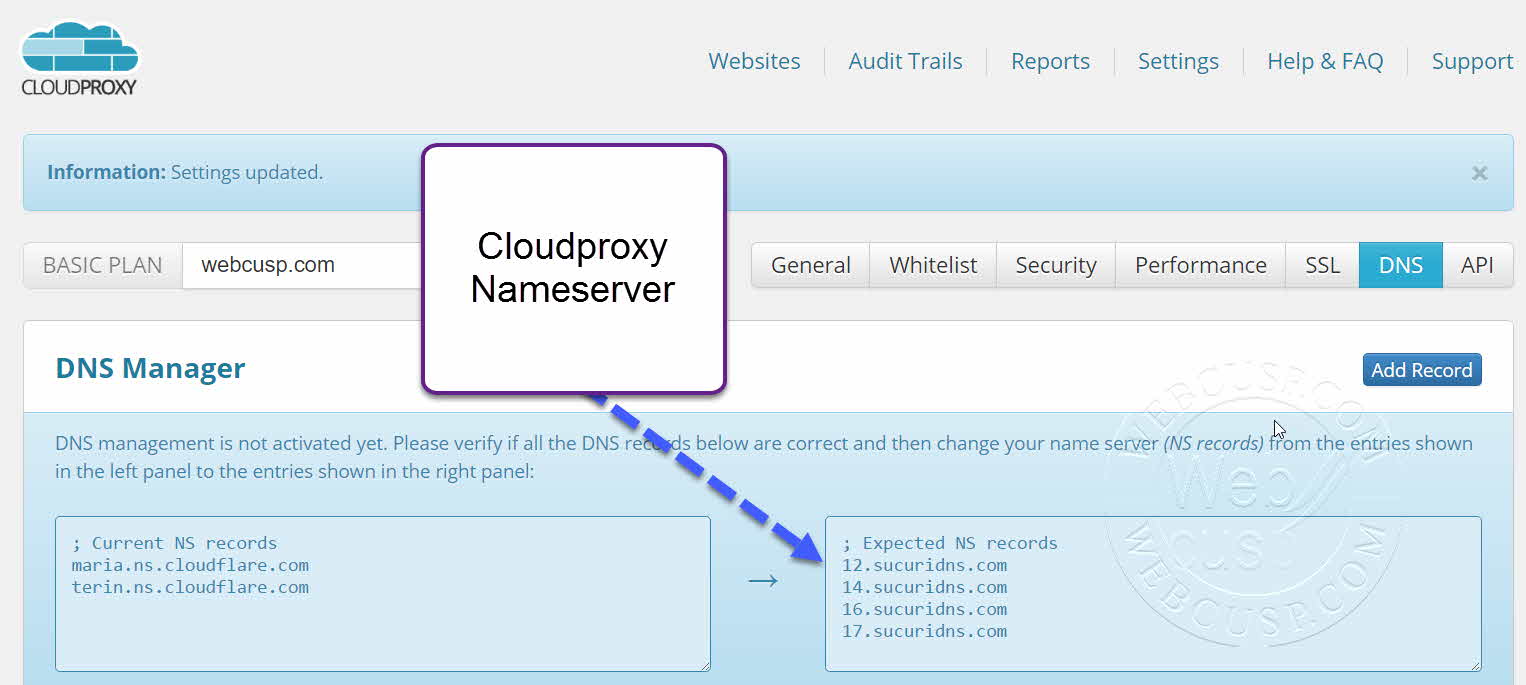
- Copy the nameserver of Cloudproxy and go to your Domain DNS management
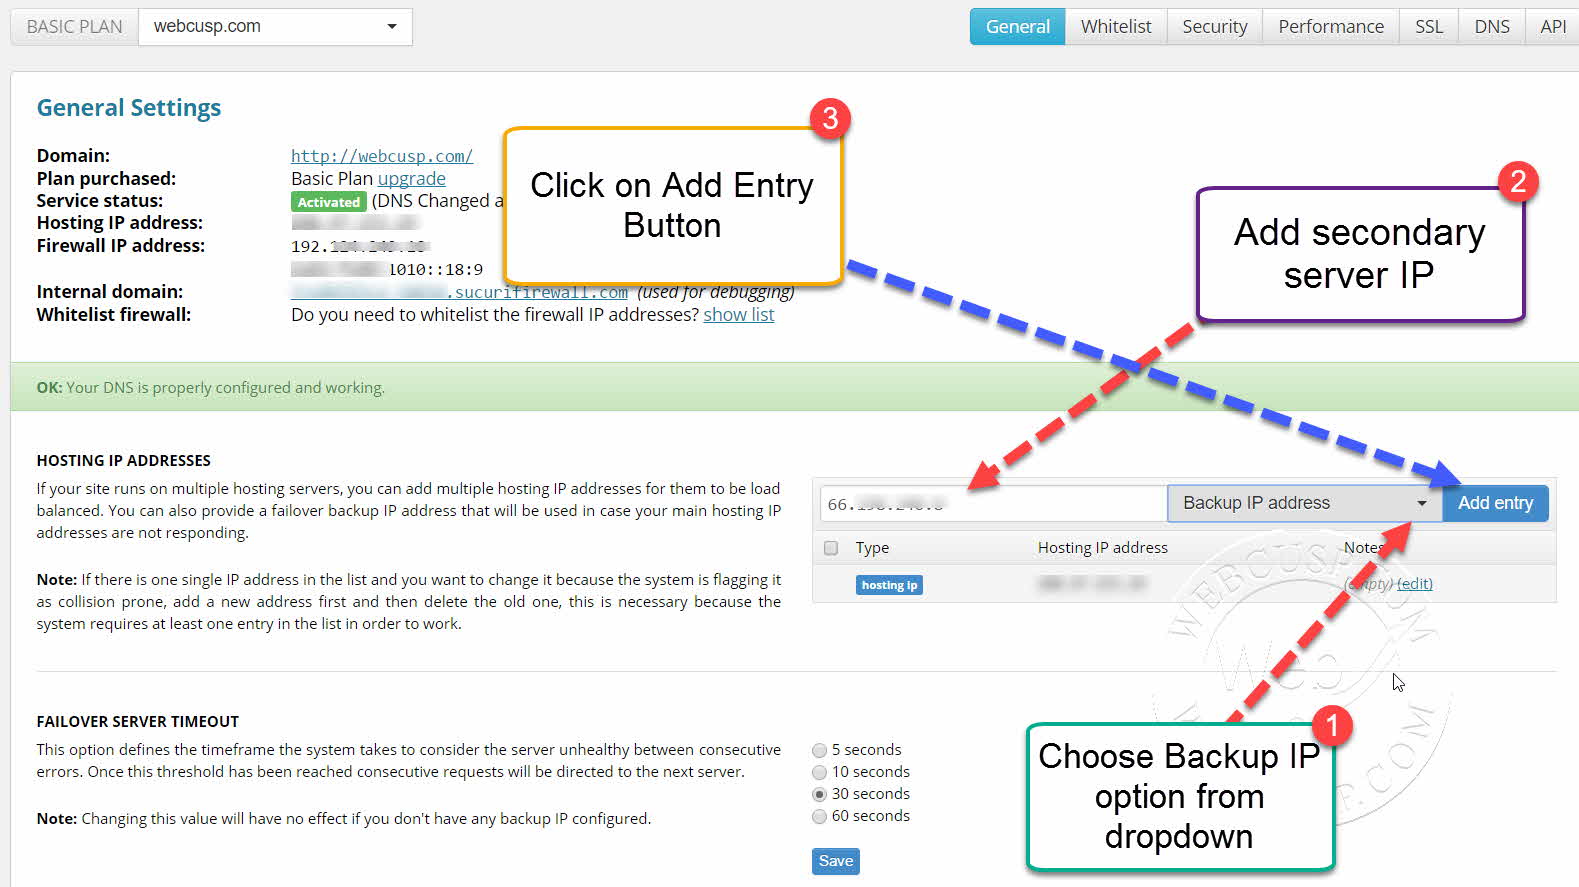
- Go back to Cloudproxy control panel and add your secondary server IP as a backup IP.
Sucuri automates the failover system based on 5xx (500, 503 etc.) server errors which trigger server downtimes. Additionally, you can specify timeout in seconds to trigger a failover
If you are using CloudFlare
If you are using CloudFlare or any other DNS manager, you can still use Sucuri Cloudproxy. All you need to do is add an A record and point it to Cloudproxy IP address (shown in your Cloudproxy dashboard)
Try Sucuri Firewall and Failover System
DNS Failover with DNS Made Easy
- To use DNS Made Easy, you need to host your domain DNS with it and you can’t use it along with CloudFlare.
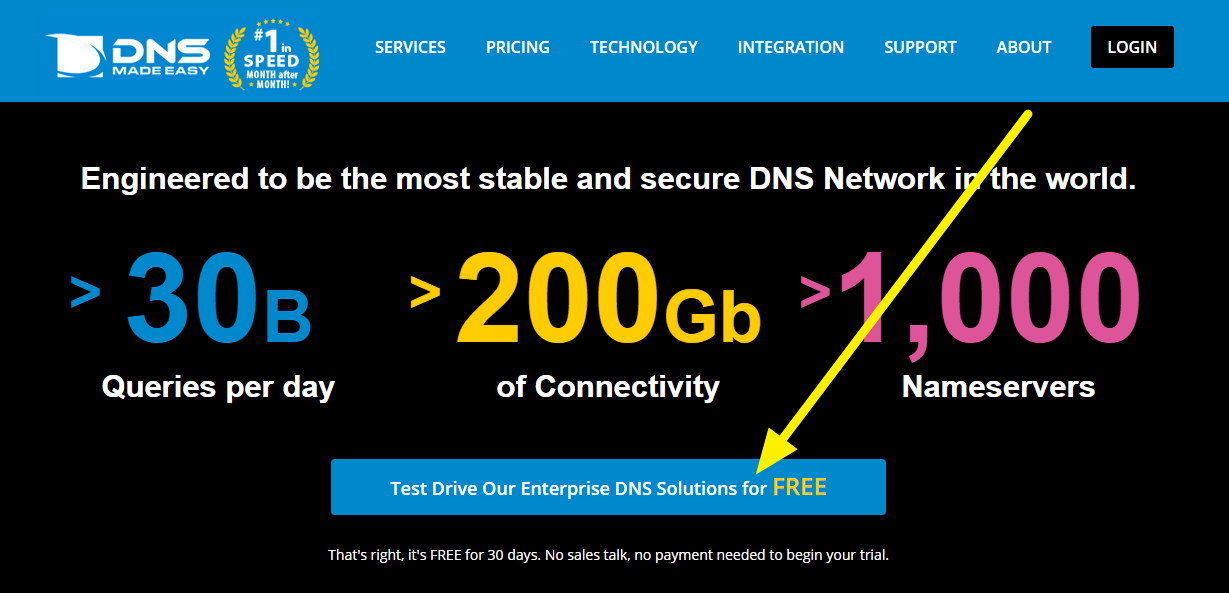
- DNS Made Easy comes with a 30 days fully free trial and there is no need to add a Credit Card. Anyone can use its DNS management and Failover service for 30 days for free.
- So first of all create a free trial account and verify your email address.
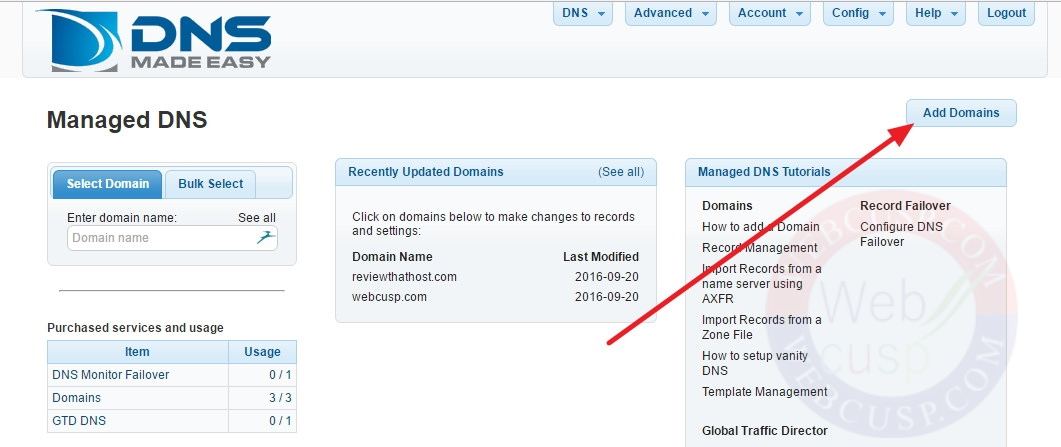
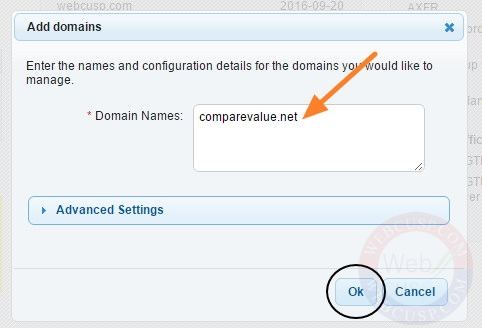
- Now login to your DNS Made Easy account and add your domain name
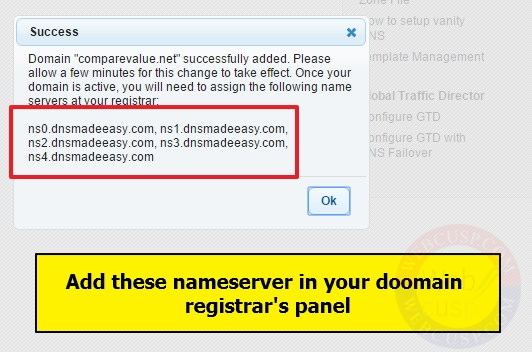
- Copy the nameserver provided by DNS Made Easy and wait for 10 to 15 minutes until your domain is set up with DNS Made Easy
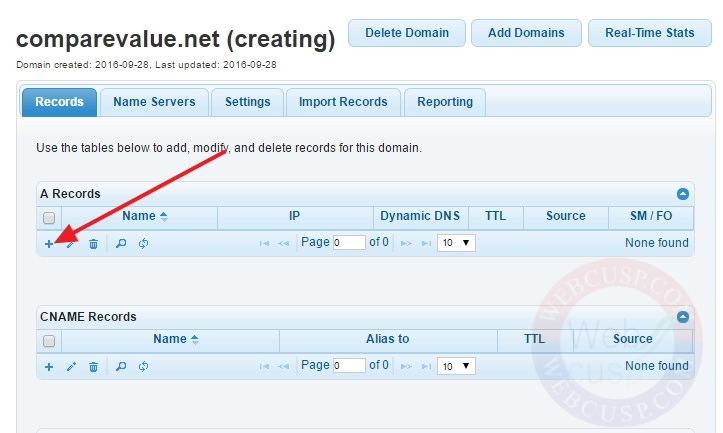
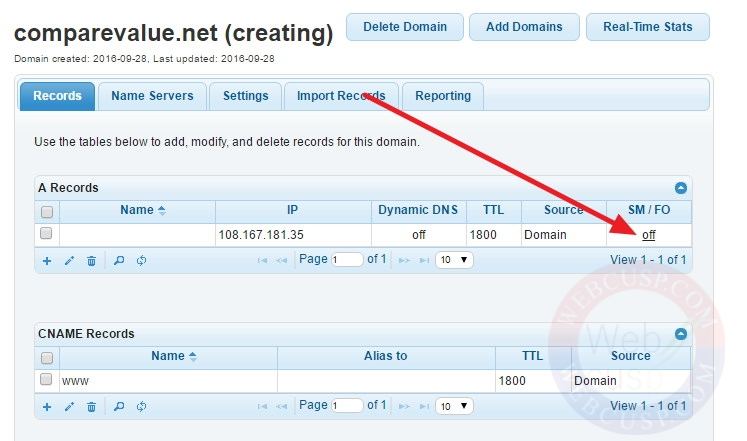
- Add the A record to DNS management with the primary server IP (as shown in the image below)
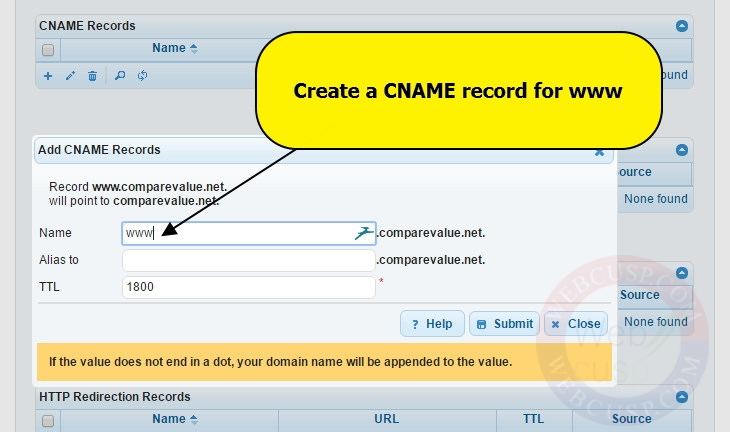
- Also add a CNAME record with name WWW (as shown in the image below)
- Now login to your domain registrar account and add the nameserver you have got from DNS Made Easy
For created “A” record, look for column “SM/FO” and click on it
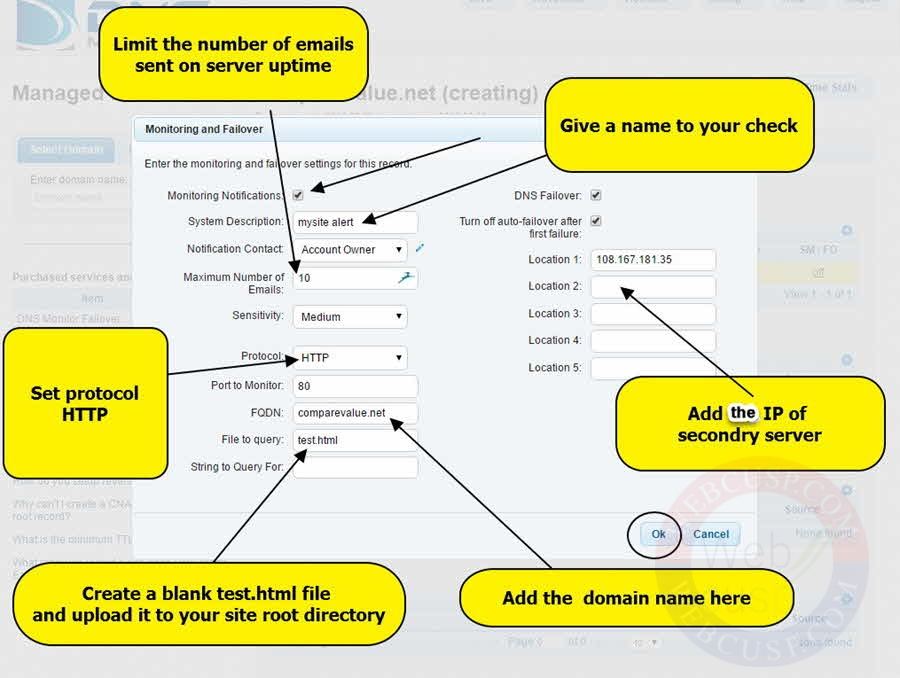
- Here you can configure server monitor and DNS Failover as shown in the given image.
After saving the settings, your failover is ready to work. Whenever primary server is down, your domain will be pointed to the secondary server automatically. It will remain pointed to the secondary server until you manually point it back to your primary server.
Visit – dnsmadeeasy.com
So which service should I use? Sucuri Cloudproxy or DNS Made Easy?
Cloudproxy or DNS Made Easy, both services have their own advantages. Cloudproxy is an amazing security system that, in addition to DNS failover and load balancing system, also protects and speeds up your website. Its failover system is fully automated. When your primary server is down, your site is pointed to a secondary server automatically. You are not notified about the server downtime.
On the other hand DNS Made Easy doesn’t provide any security and threat protection system and CDN. It is a full-fledged DNS management system that has its focus only on failover and load balancing service. You can set up one-way failover too. Whenever your primary site is down, you will be instantly notified about downtime and your site will be pointed to a secondary failover IP. So you can take advantage of uptime monitoring service also along with the failover service.

