With the help of Formidable Pro, you can, not only store entries data in WordPress database but also you can send it to 3rd party data storage services such as Google Docs, Google Contacts, Google Drive and even Google Spreadsheet etc. However, it is not a built-in functionality of the plugin and it can trigger two action by default when someone submits a form;
- sending a form entry to email (optional)
- sending a form entry to WordPress Database
If you want to add an action to send created form entry to any other external data-storage application such as Google Spreadsheet, you need to install free Zapier addon for Formidable Pro. This addon will generate an API key for you, that will be used to connect to external applications. Zapier uses this API key to trigger an action to send submitted form data to many other Zapier compatible applications.
In this tutorial, we will learn how to use Zapier to gather form entries to Google Spreadsheet or any other compatible application (available in Zapier database).
Step first – Install Formidable Pro Zapier addon
- Access you Formidable Pro account and download add-on from add-ons section
- Install and activate the plugin
Step two – Create a Zapier account
Open Zapier.com and create a free account (free plan is available with limited usage)
Step three – Click on Make a Zap
- Here you will see two sections;
- Choose an app to trigger an action (choose Formidable Pro) – choose a target app (choose Google Spreadsheet)
- Set trigger New formidable Pro Entry to Create a Google Spreadsheet Row

- Then, Zapier will ask you to connect to your Formidable Pro account.
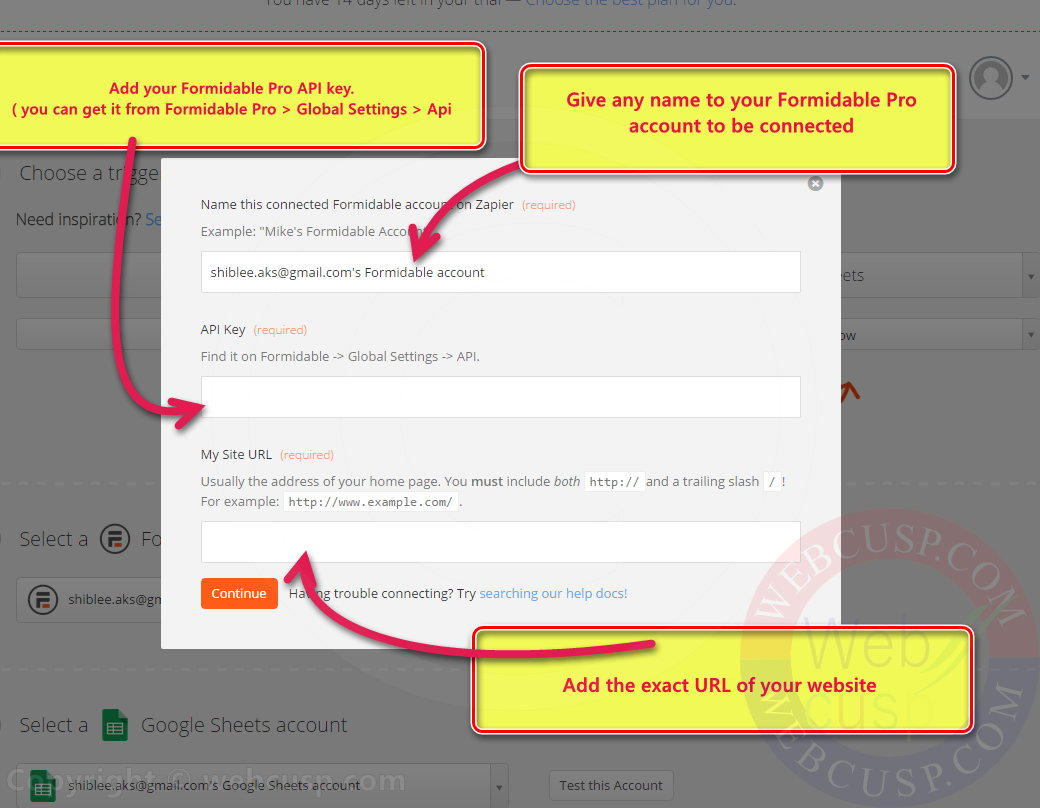
Step 4 – Connect your Formidable Pro API key and website to Zapier
- get back to your WordPress dashboard > Formidable Pro > Global settings > Api
- copy your Formidable Pro api key and add it to Zapier
- add the exact URL of your WordPress website
- and click on Continue
- Zapier will verify your
- account and if successful, it will be added to Zapier.
Step 5 – Connect your Google Spreadsheet account to Zapier
- After that, you need to connect to your Google Spreadsheet account (login to your Google account in a separate tab and create a new spreadsheet using this URL > Create a new spreadsheet > Add one field name of your form per column)
- Zapier will ask you to permit to access to your Google account. Let it connect.
Step 6 – Linking Google Spreadsheet with your Formidable Pro form
- On connecting to Google Spreadsheet account, Zapier will ask you to choose a form from dropdown list.
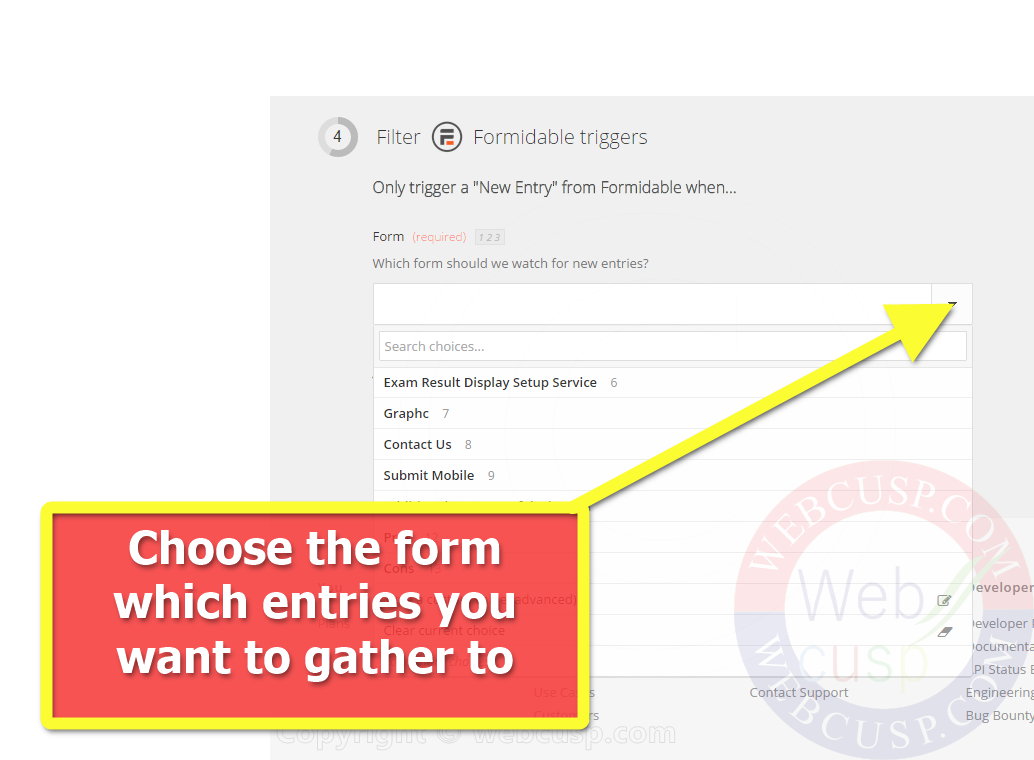
- Select the desired form and click the “continue” button
- Now select the Google Spreadsheet from the dropdown
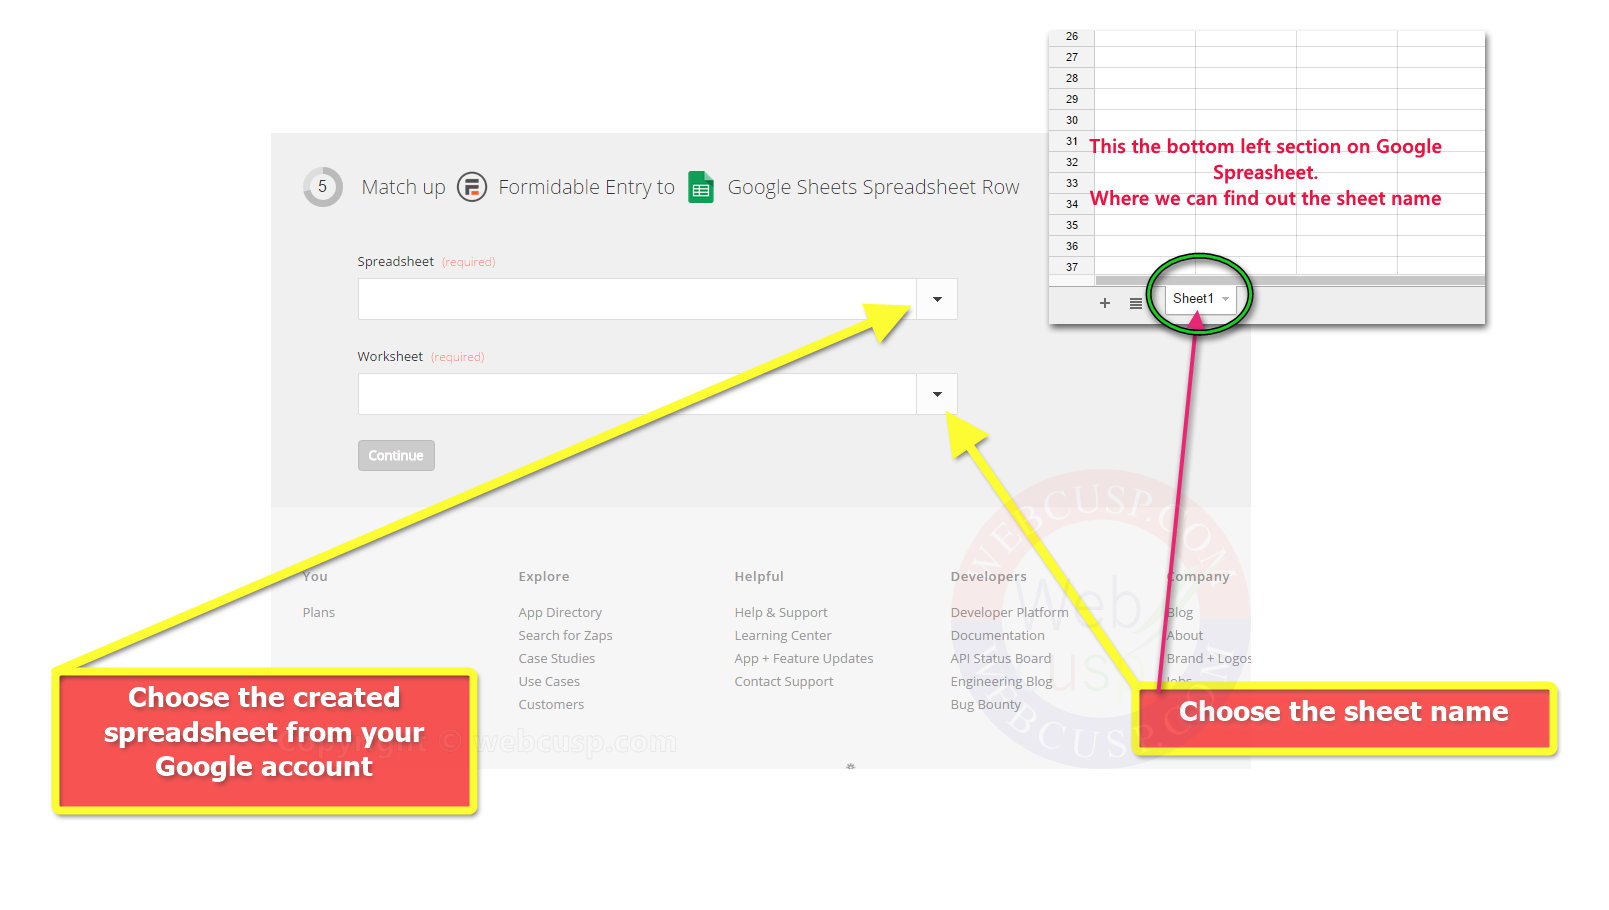
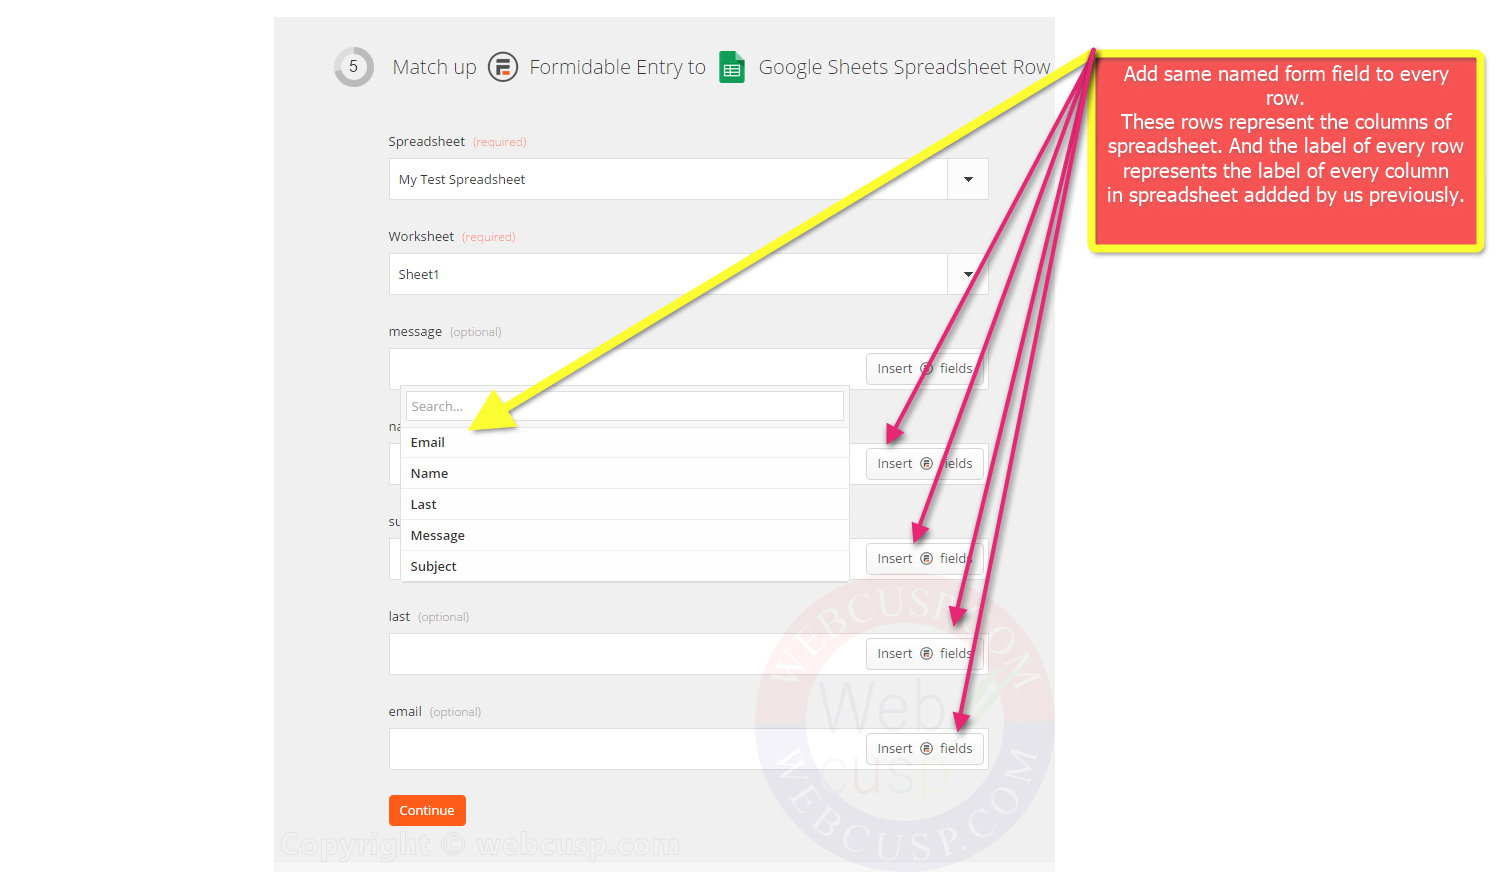
- On selecting the spreadsheet, Zapier will ask you to connect form fields to same named columns of the spreadsheet (created by us formerly)
Step 7 – Finishing up the operation
Zapier will ask you to create a test entry in your form, and then it will investigate whether it is accessing newly created data or not. If it successfully accessed the new entry created, it will post your entry to spreadsheet connected to your Formidable Pro form.
Switch to Google Spreadsheet tab of your browser and you will find that your test entry is added to the spreadsheet.
That’s all.

