Sometimes we need to create hover effect for certain images such as partners logos. You have observed logo images in the footer area of many websites which, when hovered by mouse, show different color. This hover effect is created with the help of CSS (but without coding and no coding is required) and it involves a little CSS workaround.
Creating a hover image effect that doesn’t include a hyperlink to image, is rather easy and it can be created applying different background images for normal and hover state. On the other hand if you want to include a clickable hyperlink to hover image, you will need to be a little tricky using CSS.
In this tutorial we will tell you how to create beautiful hover effect in the most easy way.
With the help of Microthemer
Microthemer is a unique kind of plugin with the help of which we can edit CSS live on frontend with easy options and adding CSS code is optional. Microthemer is likely to work with any WordPress theme. Here we show how to use this plugin to create a hover image effect.
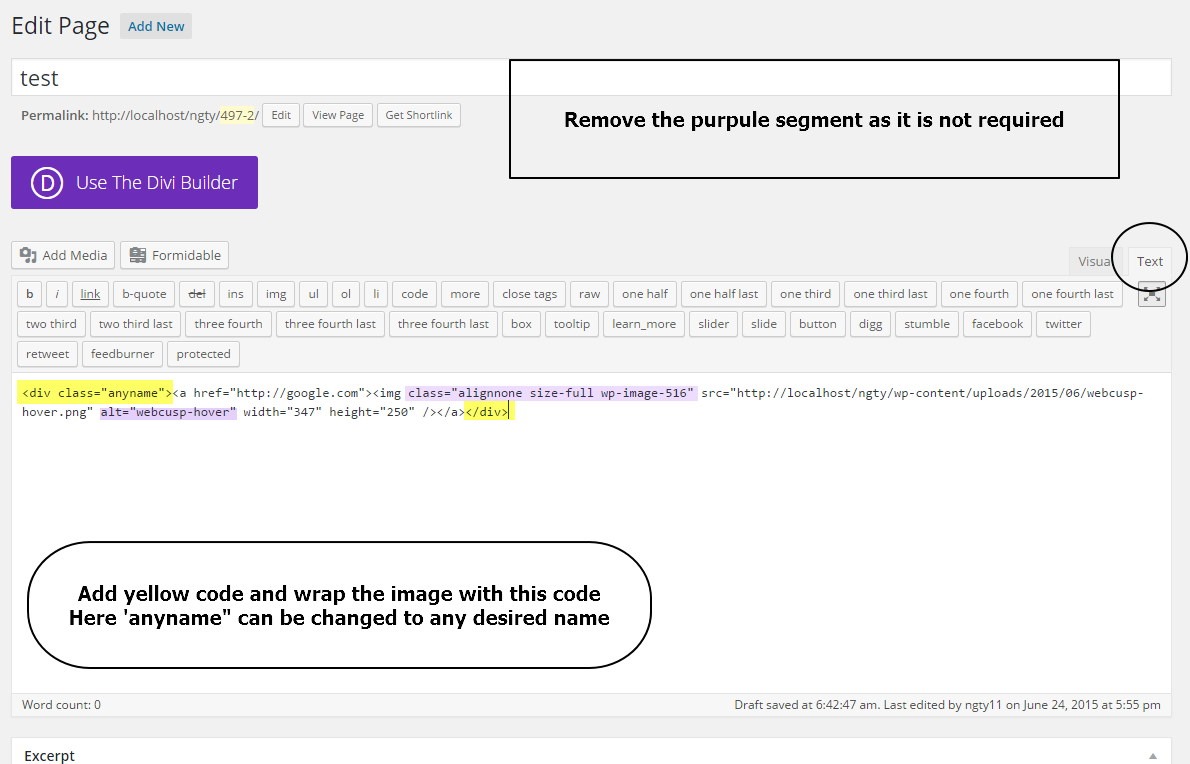
- First of all create a new test page and insert an image in that page using “add media” button
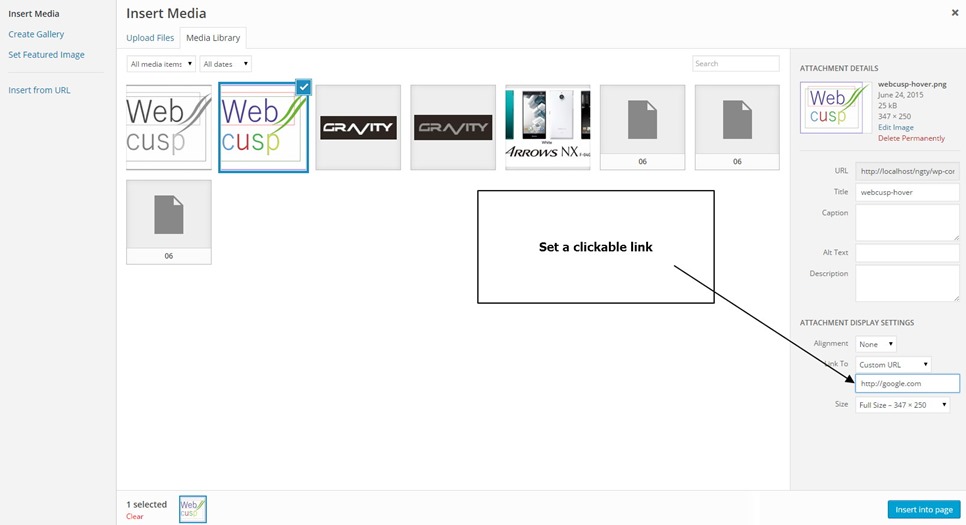
- Add a link to make this image clickable
- Now in post editor switch Visual editing to Text as shown in image. (Figure 2)
- Wrap the image with a division with a class as specified in image (Figure 2). You can change class “anyname” to your desired name.
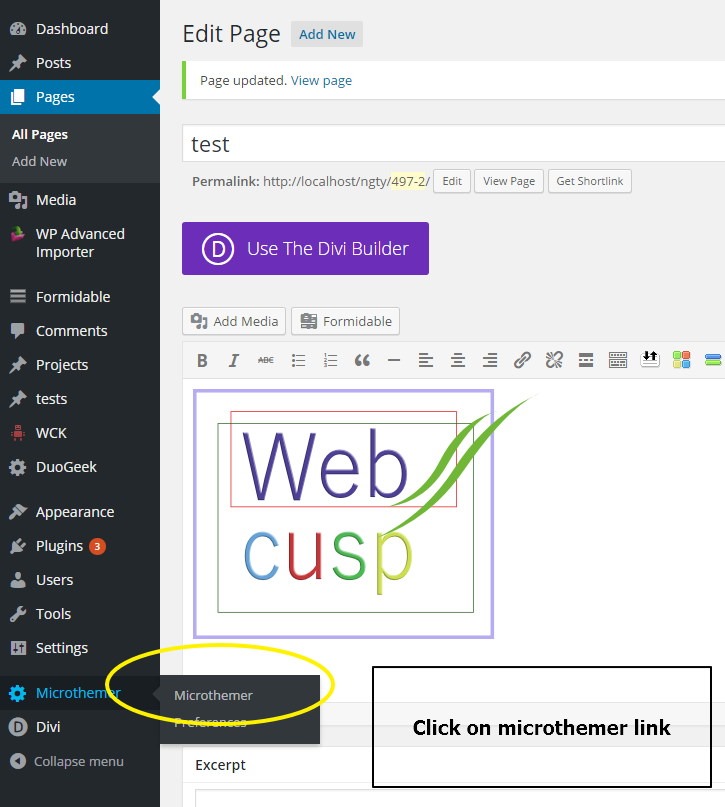
- Now open Microthemer. (WordPress admin panel > Click on Microthemer)
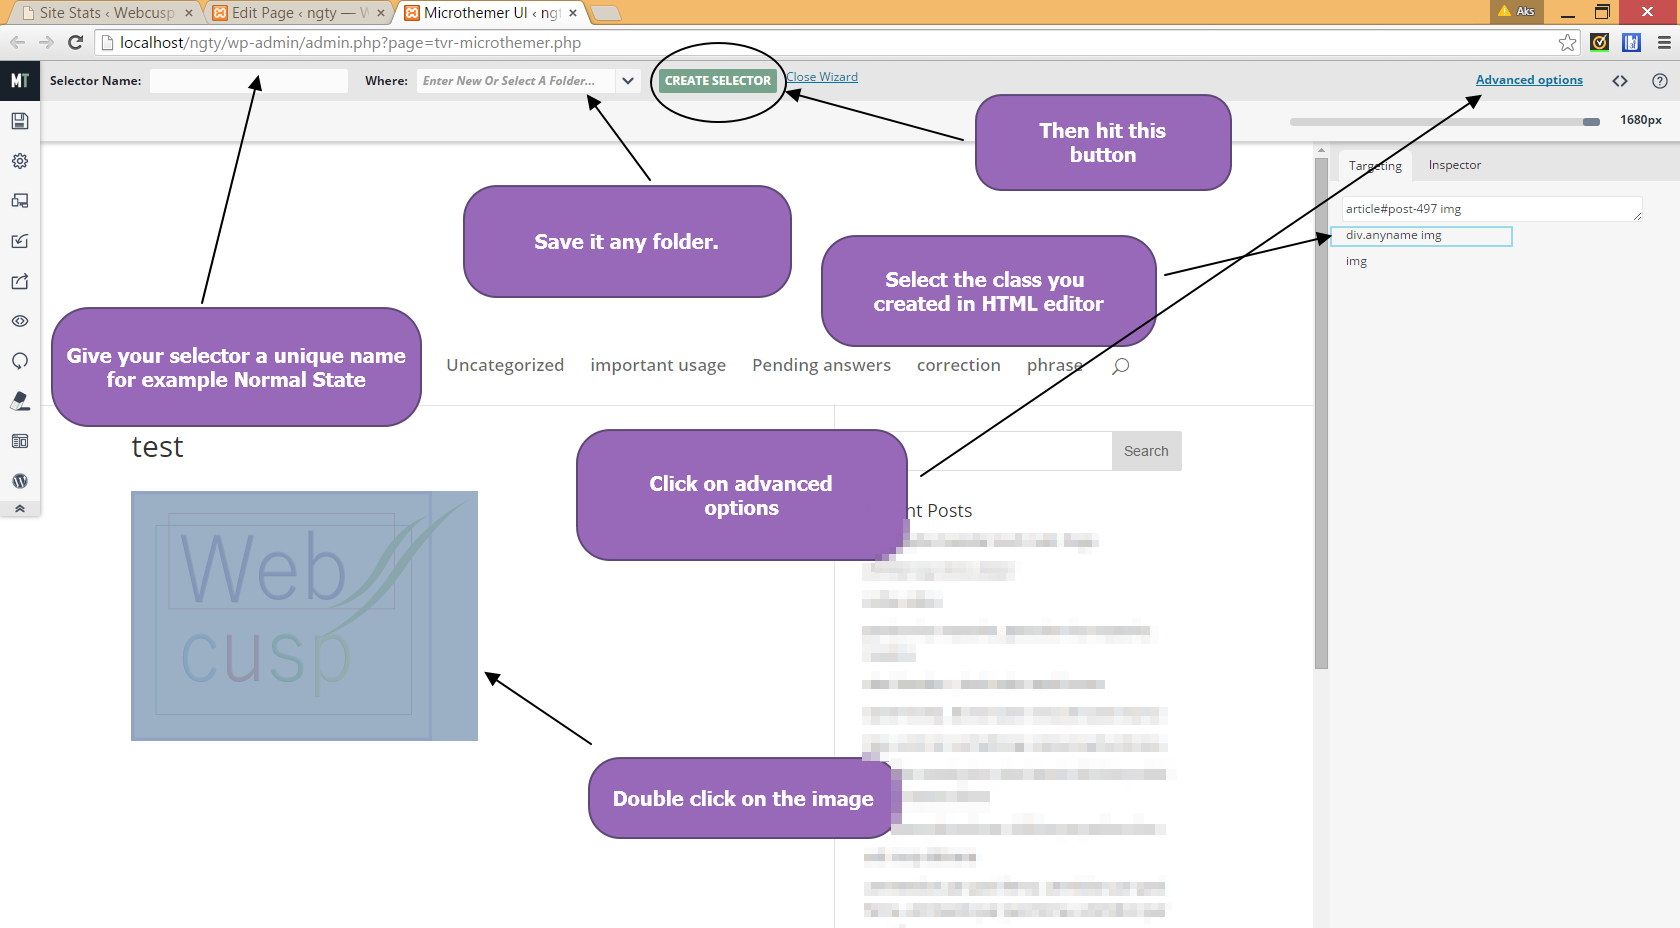
- On Microthemer panel, double-click on the image. Microthemer will ask you to create a selector for all related classes to this image. But before creating a selector, you need to be more specific. Look around the top right corner of the panel and you will see a link “Advanced Text”. Click on this link to show “targeting” options. In “Targeting” section, there are shown all CSS classes attached to the image. Choose the class you have added in division that wraps image. And then create selector with any desired name. Because you are creating this CSS style for normal state of image so you can give it a name “Normal State” (Figure 4)
- Now we need to edit the selector code. Because the target selector is for image but we need to target the division that is wrapping the (Figure 5). As shown in the image, remove img from div.anyname img
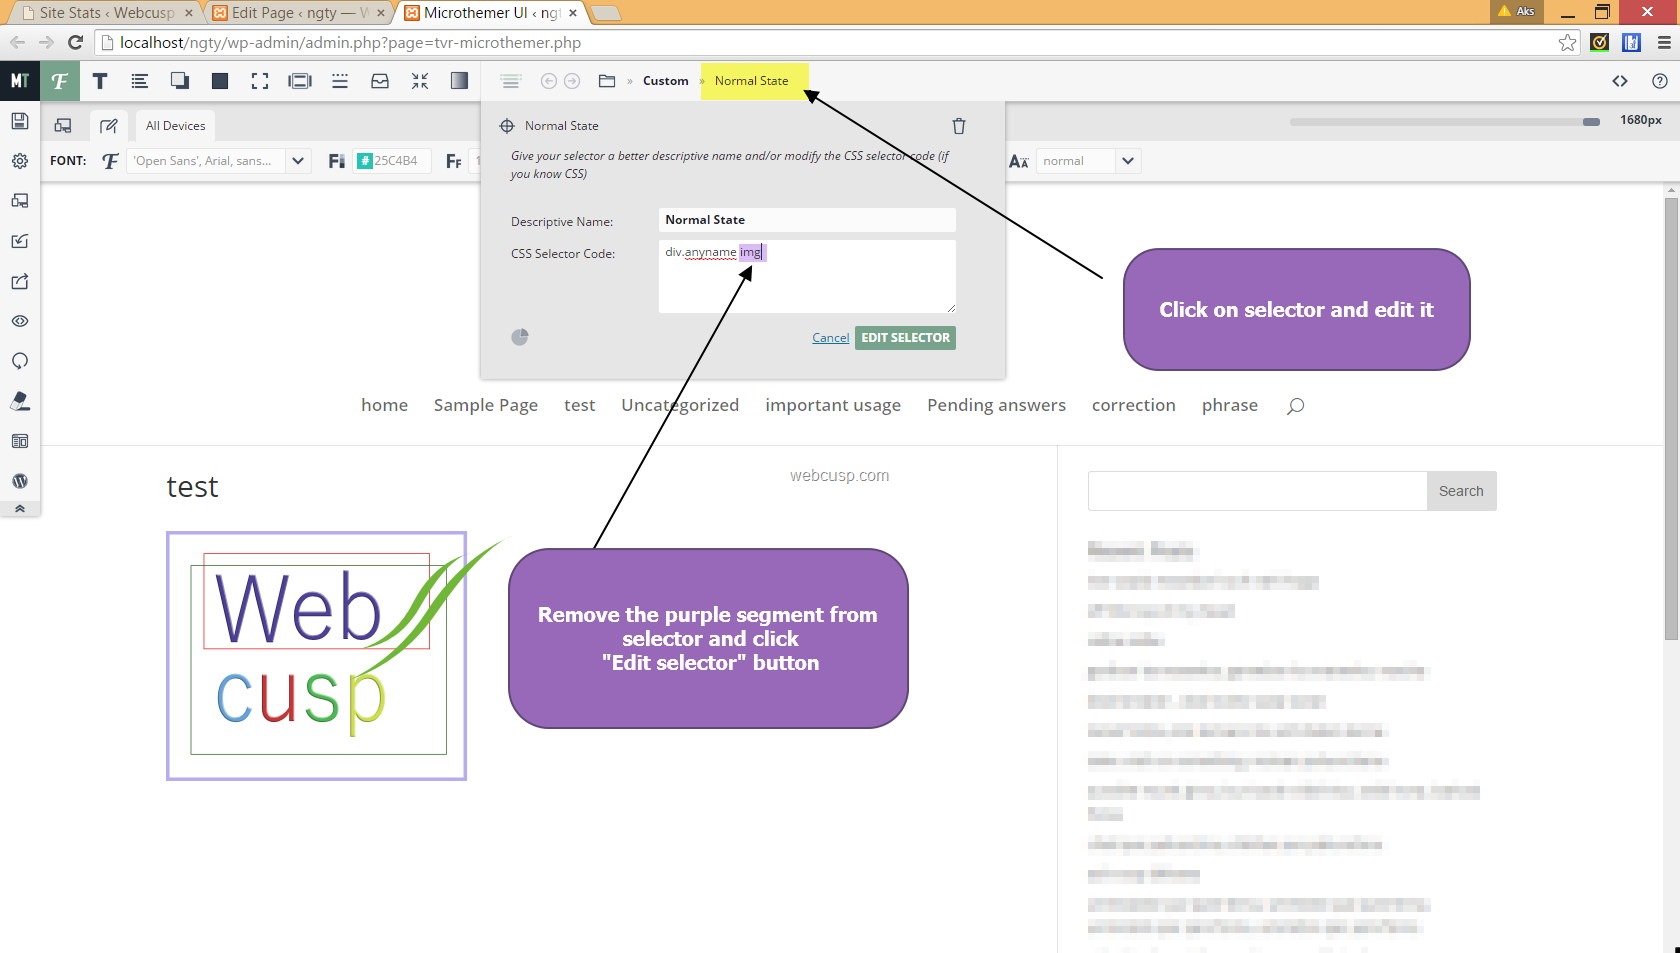
All preparations have been done. Let’s start doing easy jobs with Microthemer
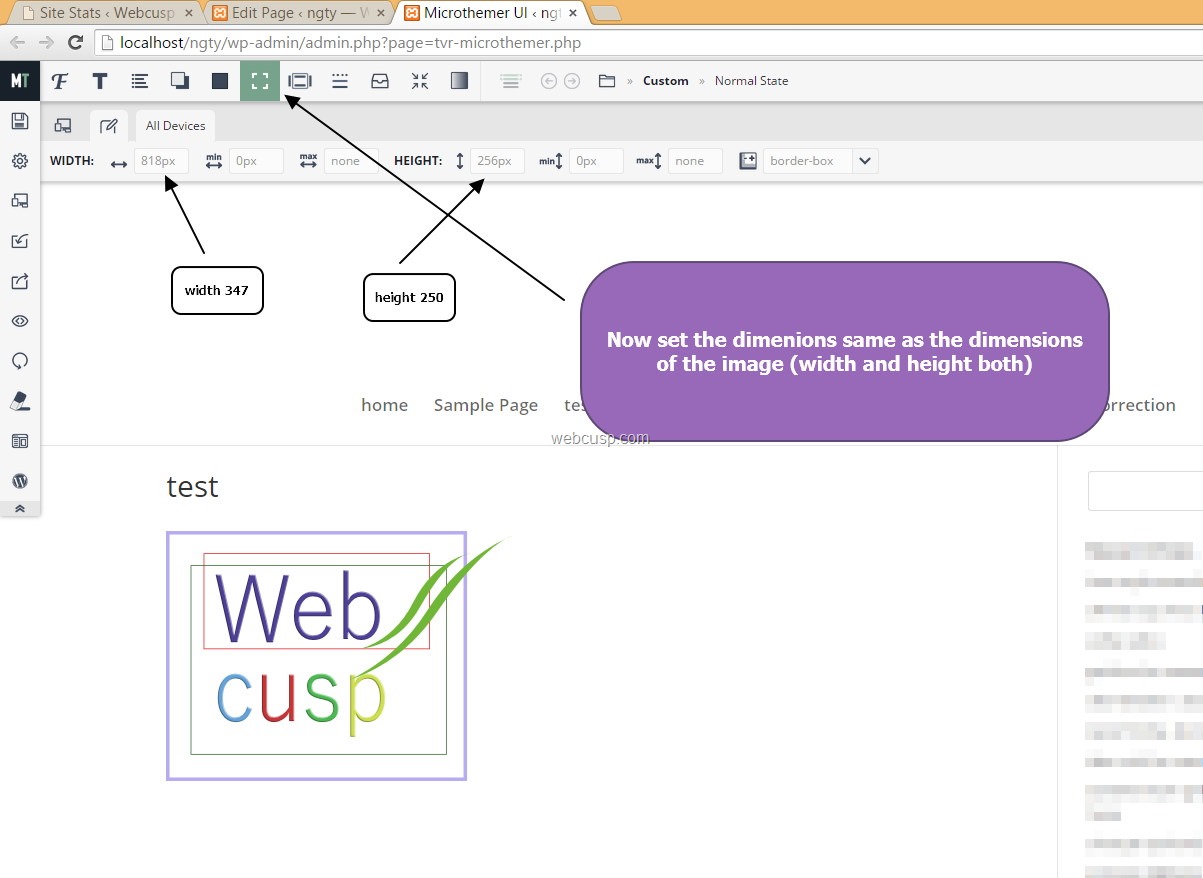
- In top option bar, click on Dimension icon. Set Width and Height exactly to width and height of the image
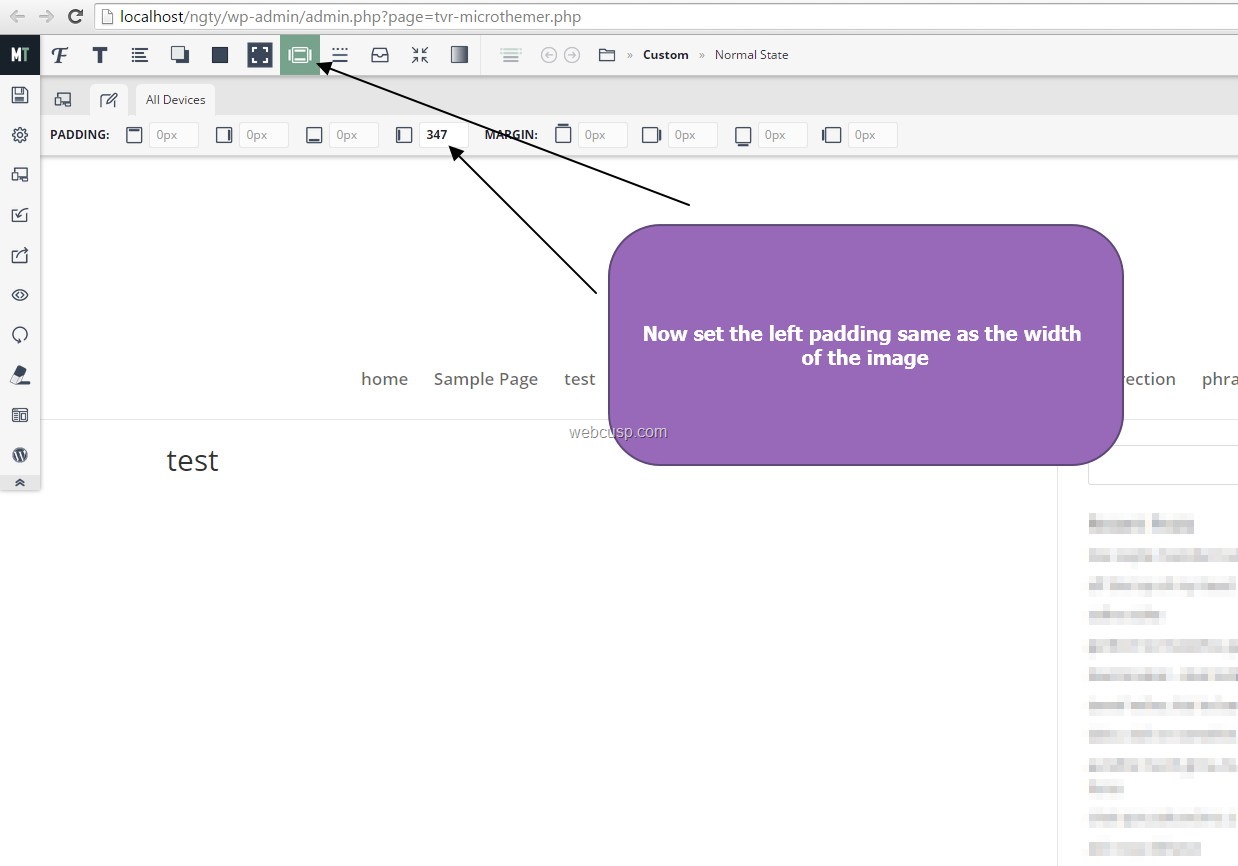
- Then click on Padding icon and set left padding exactly to width of the image. This will make the image disappear. (Figure 7)
- Now click on Background icon and upload the image that you want to show on normal state
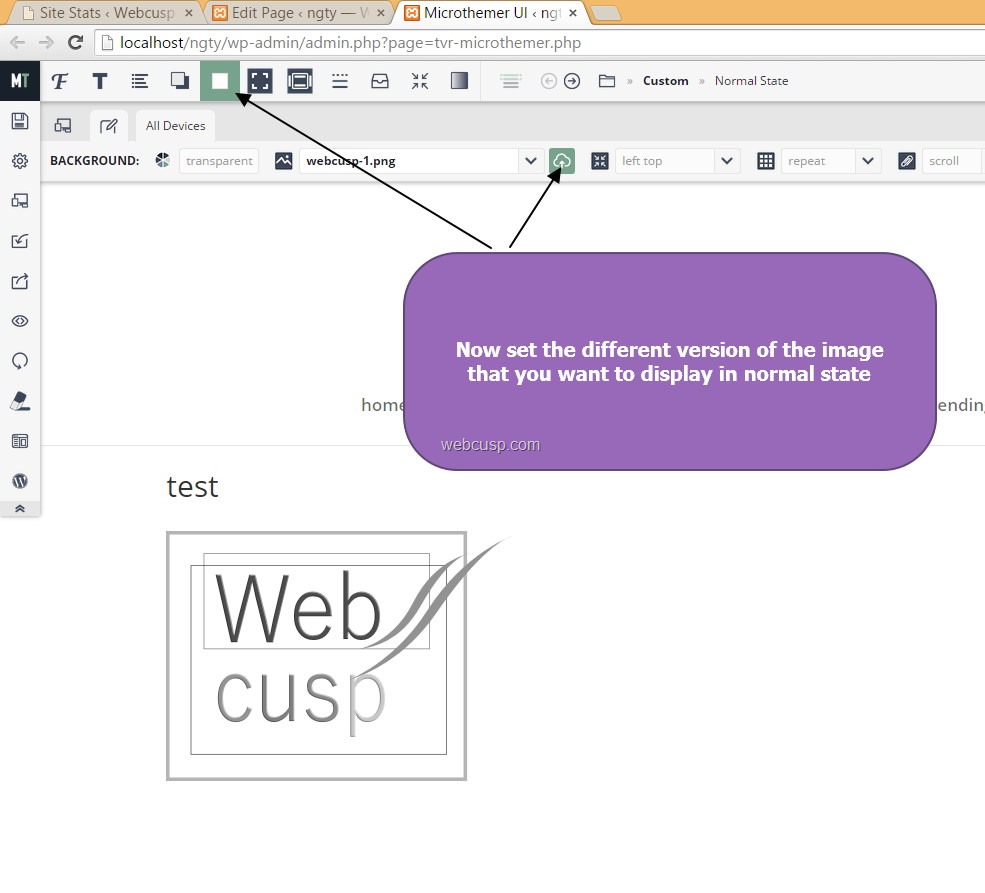
You have done editing normal state and it is time to create hover style
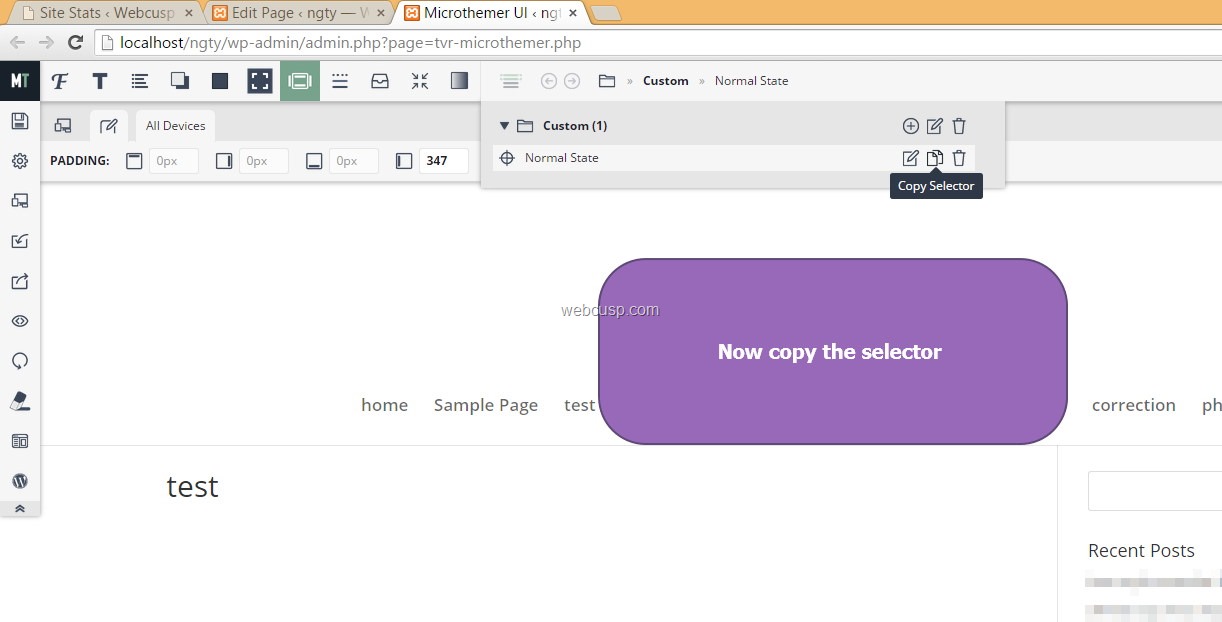
- Copy the selector as shown in Figure 9, 10 and add the following code to copied selector code; :hover and then save the new selector with any desired name such as Hover State
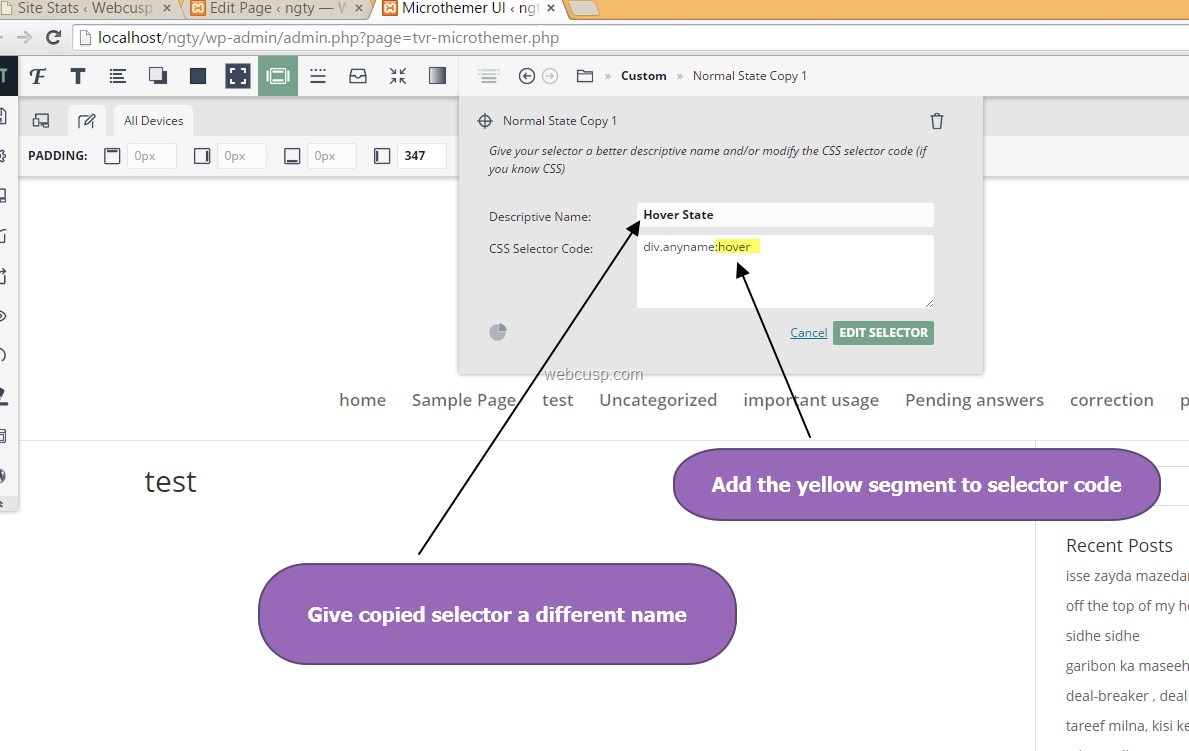
- For new selector, all you need to do is setting left padding to 0px.
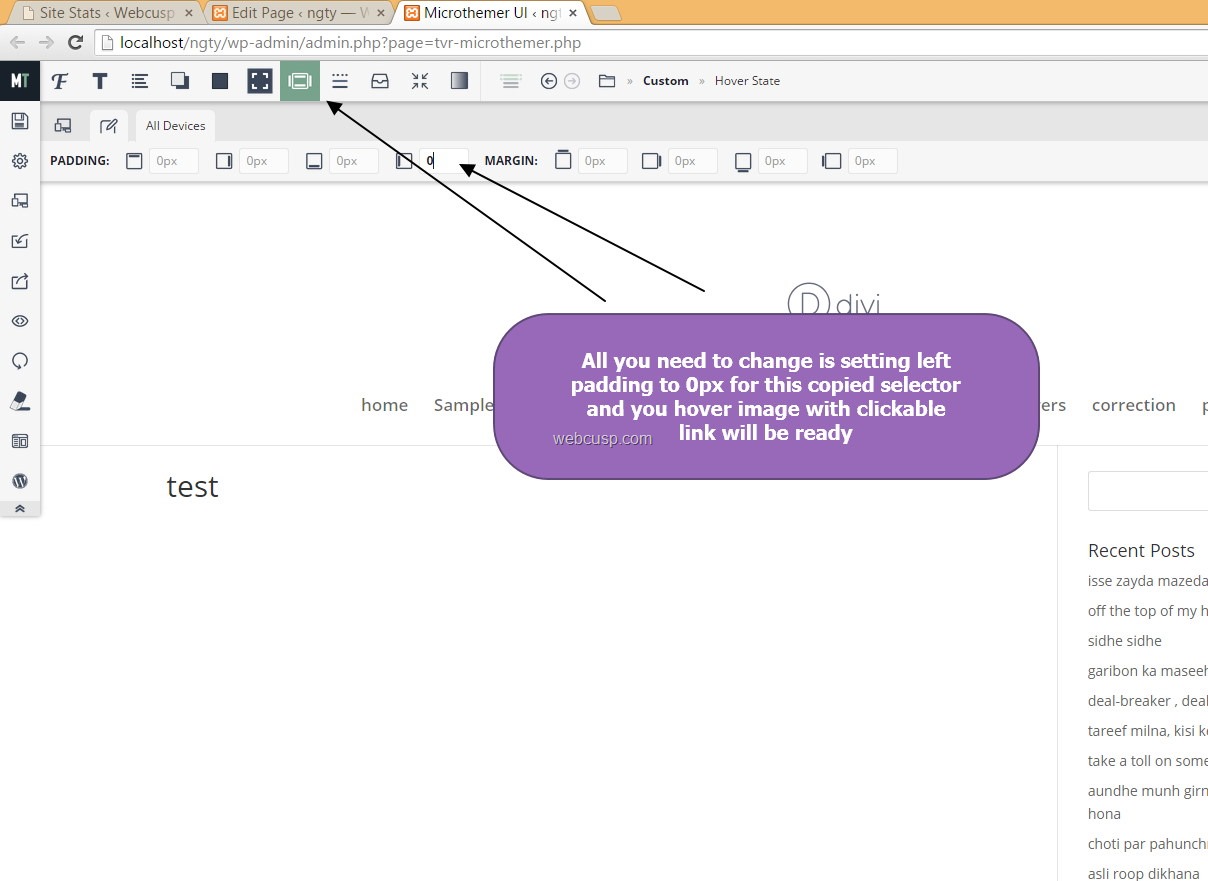
All done. Your hover image with clickable link will be active.
Alternatively, you can use the following CSS code into your theme style sheet to make this hack working.
This code is generated by Microthemer in the above process;
/*** Microthemer Styles ***/

/* =Custom
-------------------------------------------------------------- */
/* Normal State */
div.anyname {
	background-image: url("/ngty/wp-content/uploads/2015/06/webcusp-1.png") !important;
	width: 347px !important;
	height: 250px !important;
	padding-left: 347px !important;
}
/* Hover State */
div.anyname:hover {
	width: 347px !important;
	height: 250px !important;
	padding-left: 0 !important;
}
Replace name of CSS classes and background image URLs with your own.
Here is the HTML code;
<div class="anyname"><a href="http://google.com"><img src=".../wp-content/uploads/2015/06/webcusp-hover.png" alt="" width="347" height="250" /></a></div>
Microthemer is a plugin that is developed to make CSS styling damn easy for beginners and developers as well.
Read more about Microthemer – Microthemer vs CSS Hero

