It is not so uncommon that for one reason or another you sometimes decide to change the cloud storage service you have been using for a long time. Cloud storage service may be OneDrive or Google Drive or Dropbox.
Now, a number of reasons can be enumerated for the change such as-
- Quality of the cloud storage you have been using might start going south.
- The cloud service you have been a client of might announce a sudden price hike and you thought the new price was unreasonably high.
Similarly there may be a whole gamut of reasons and one or more of them can make a client consider to change his or her current cloud storage service to another. Okay, you have finally made your mind which cloud storage service is going to replace your current storage service and now you need to transfer all your data from the old Cloud storage to new one. But how? Transferring such a huge amount of data from one Cloud to another is not only mercilessly cumbersome but also devastatingly time-consuming. Just imagine how much time and energy you’re going to spend in transferring one hundred GB of stored data from one place to another.
.
At present I’ve been using 1TB plan of OneDrive and more than 100GB of my data is stored on OneDrive. This much amount of data was not accumulated in just one day. Actually, you keep storing your data on the cloud storage and thus the amount of data stored on the cloud keeps increasing day by day. So along with the build-up of stored data on the cloud, it was also imperative for me to make sure whether it was practically possible to move such a colossal amount of data to Dropbox or any other Cloud storage service in the future just in case. So I did some research on this subject and ultimately came across cloudHQ, which impressed me very much. With the help of cloudHQ, we can connect several different cloud services together and sync data in between them. As for MultCloud, yes, it too is designed to serve this purpose very efficiently but the thing is that it allows only limited data transfer and even if you are a premium user, you can transfer only as much as 150GB/month. On the contrary, If you are a subscriber of cloudHQ’s, you can transfer as much data as you want and the cherry on the cake is there is no bandwidth limit.
So, guys, in a nutshell, with the help of cloudHQ, you can move your data that is already saved on a cloud storage service to another cloud storage service. Now, you may be wondering whether you can migrate big cloud backups to another cloud storage only with the paid plan of cloudHQ. Or is it possible for free as well? Yes, you can transfer big amounts of data for free. How? Just a little bit of rigging things.
So let’s get started and have a look on how, with the help of cloudHQ, we can move our data to Dropbox, OneDrive or Google Drive.
First open cloudHQ website in your browser and go to its pricing page.
You will see different plans with different features.
Head over to its Premium Plan and choose the option’ try free for 15 days’. Luckily, there is no credit card required to avail its full working trial for 15 days and all you need to do is follow step by step wizard to transfer your data.
Provide your email address to sign up.
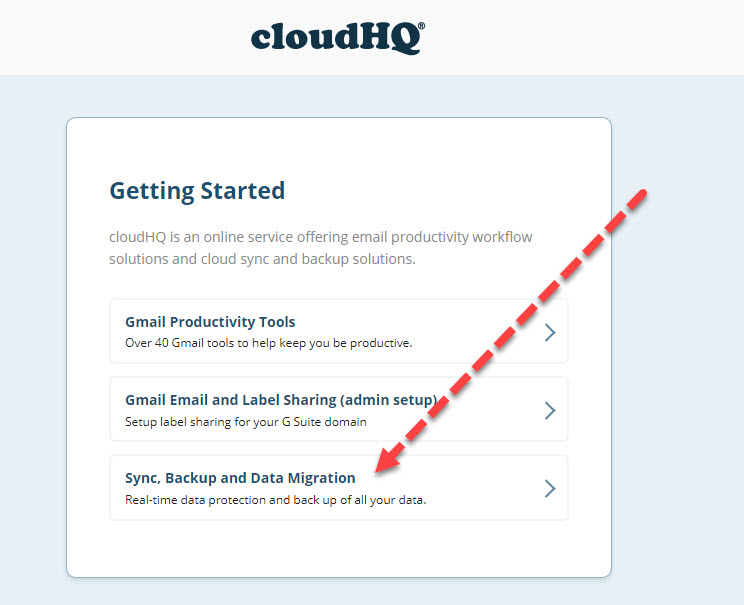
From getting started wizard, choose the option ‘Sync, Backup and Data Migration’.
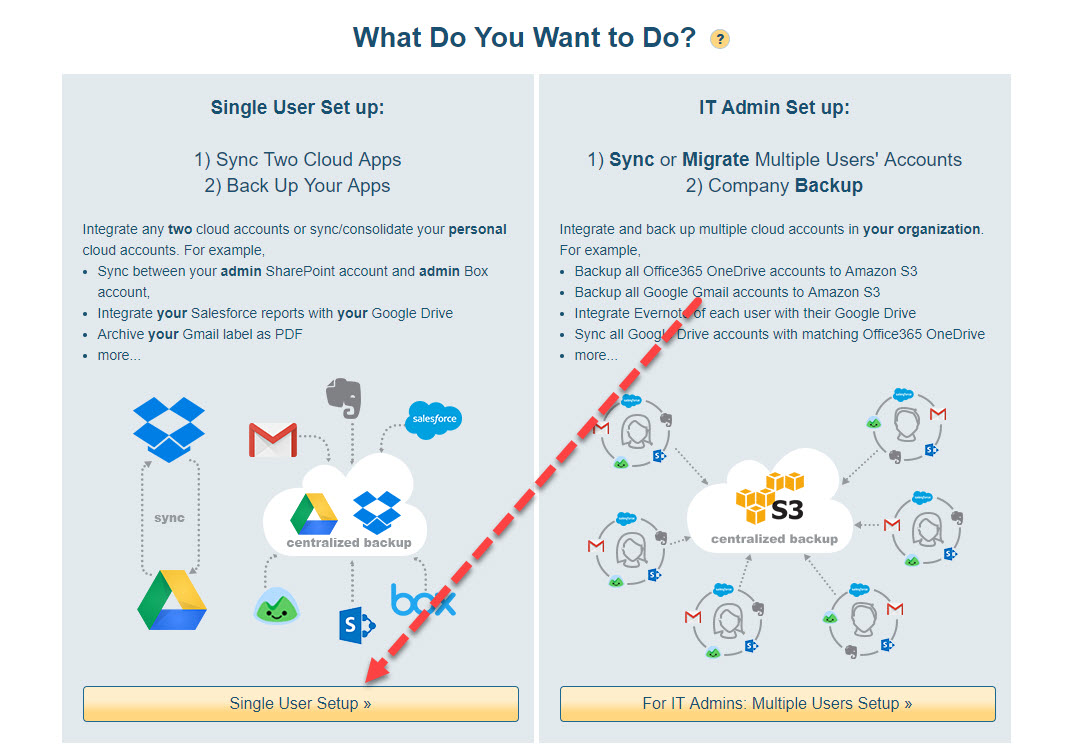
Choose Single User setup
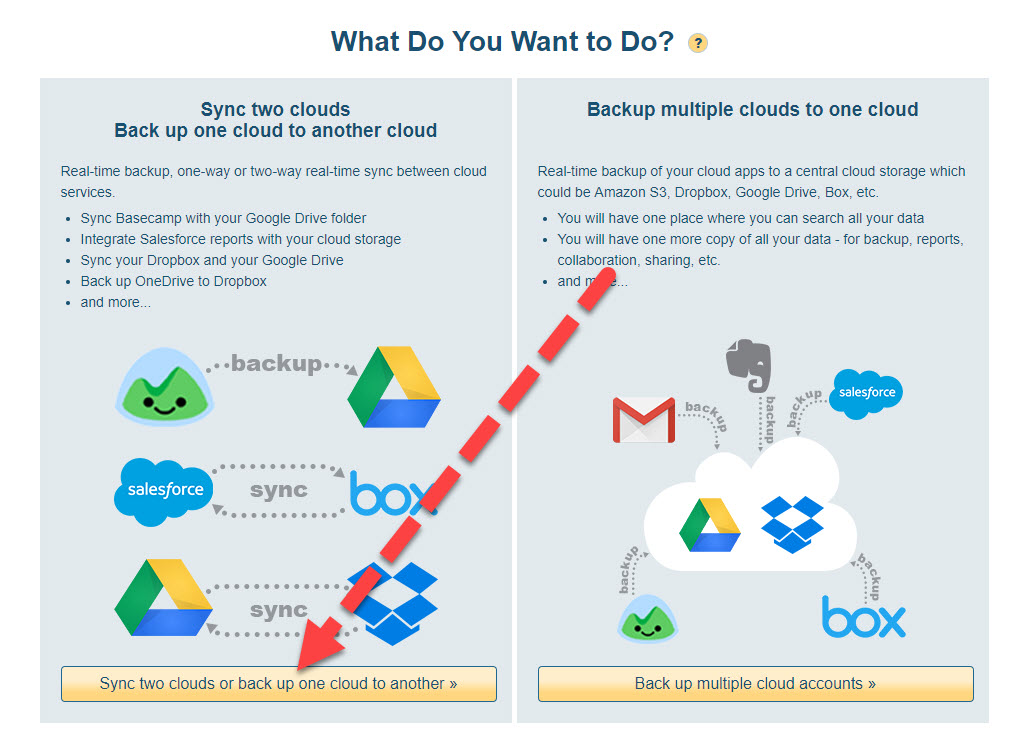
Choose ‘sync two clouds or back up one cloud to other’.
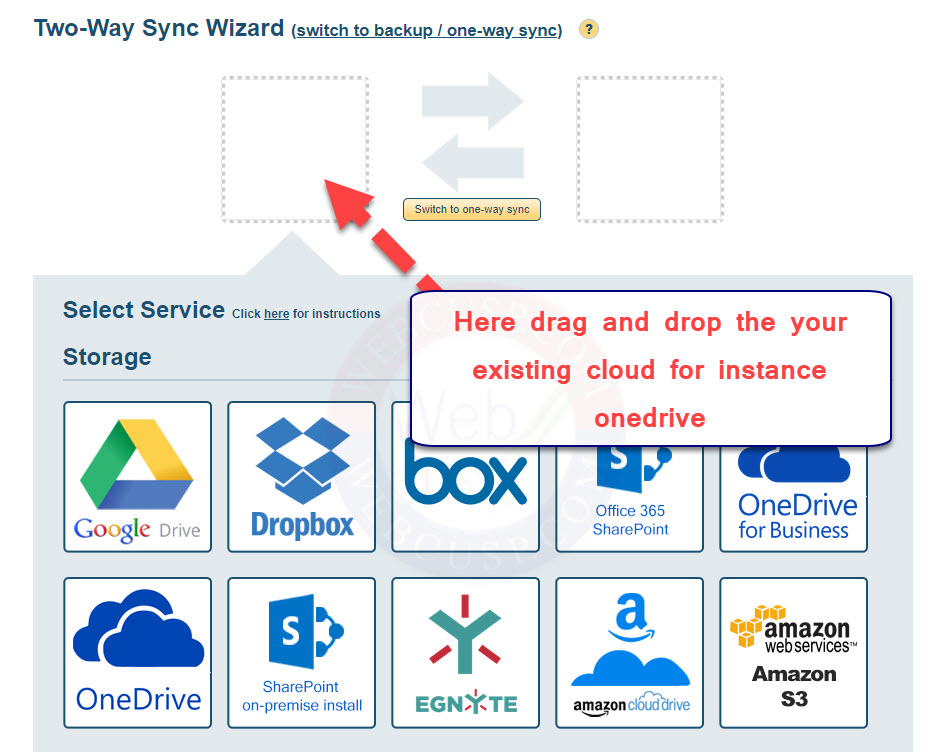
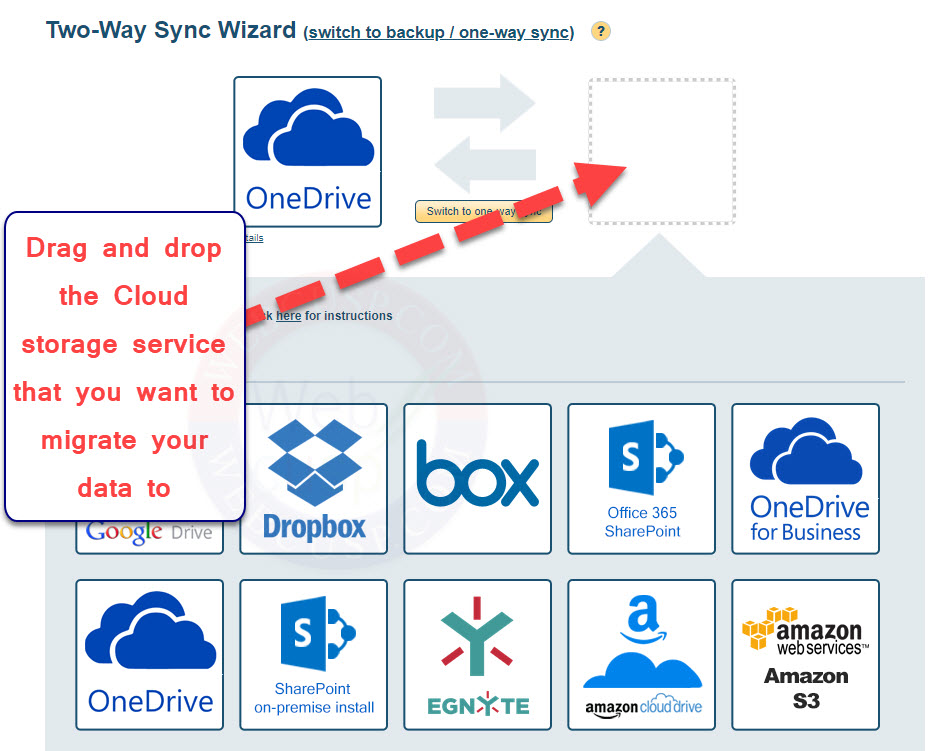
On the next screen, you will see all available services between which you can sync and transfer your data.
Into the first box, drag and drop the cloud storage service that you are currently using (in this demo we are transferring data from OneDrive to Dropbox but you can do vice versa too).
cloudHQ will authenticate your cloustorage account and you will need to give it certain permissions to read your data saved on your cloud drive. After authentication, you can go ahead and continue to the next step.
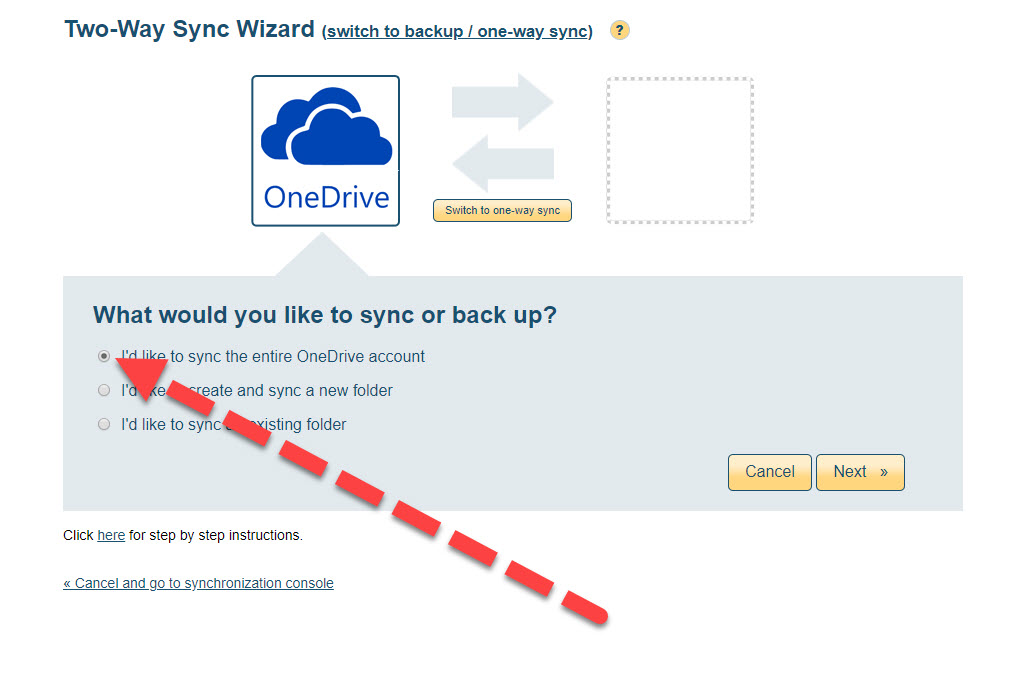
Now you need to decide whether you’re going to transfer all your existing data or only selected data. You have an option to exclude some folder from sync or you can sync entire account.
You have set up the cloud storage account from which data has to be moved. Now, you need to set up the cloud drive to which your data has to be moved.
Choose the drive from available blocks and drag it to the box (in this video we will set up Dropbox).
cloudHQ will authenticate your Dropbox account and set up certain things.
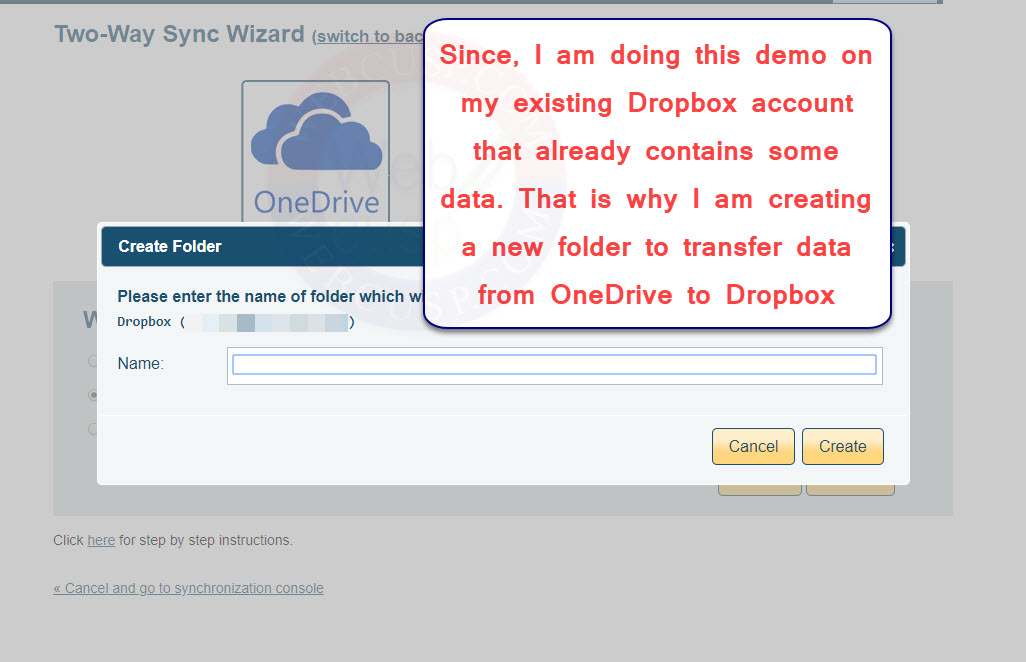
If your Dropbox (or drive that you are moving data to) is empty then there is no issue on choosing ‘entire drive sync’, but, if you have already some data stored on the new drive, you may be prompted to ‘create a new folder’.
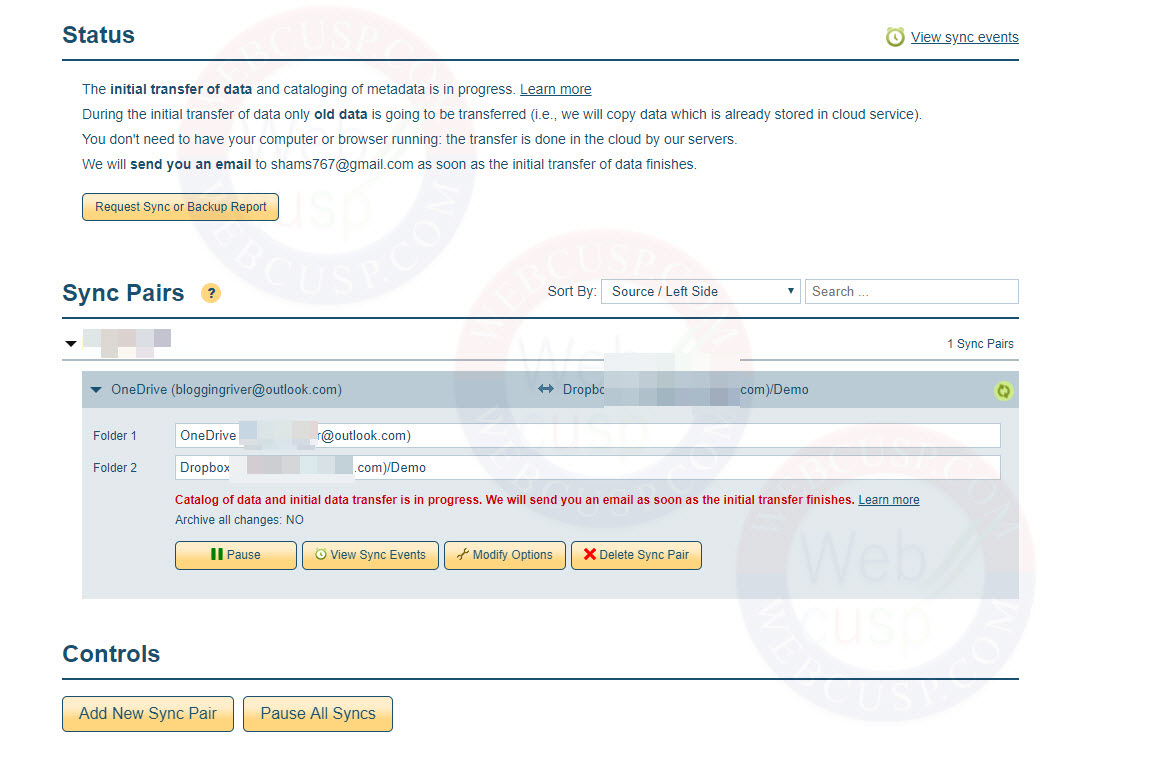
You have completed the setup. Now, hit the start sync button to start transferring data to your new cloud account.
It may take hours to transfer all your data depending on the size of the data.
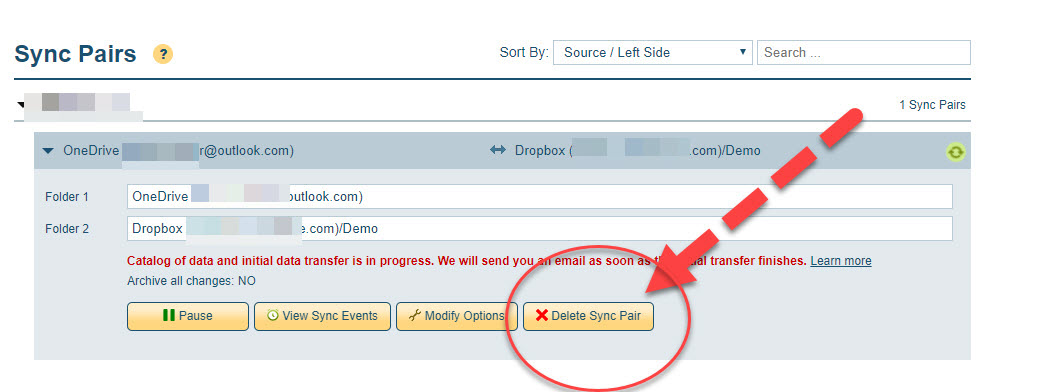
After data transfer is over, you must delete the sync pair in cloudHQ to avoid file deletion and unnecessary reverse syncing. Note that deleting a sync pair will not affect files on your old and new cloud account.


