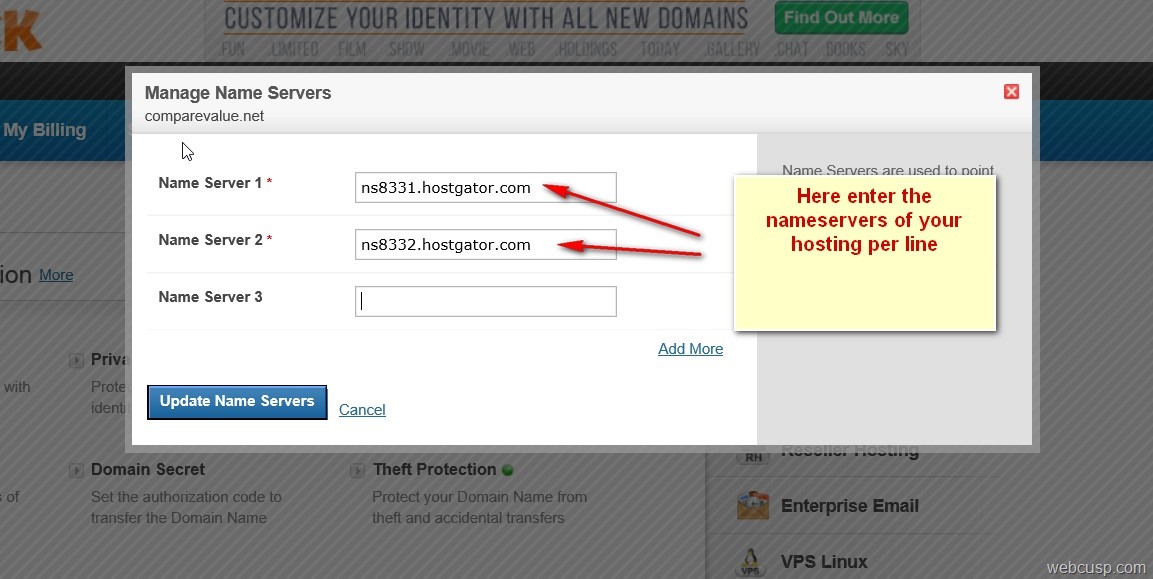
What are the nameservers/DNS servers for a beginner
Namesevers are must to be setup to connect your domain to your hosting account
for beginners – There is no need to be worried about knowing much what they are. All you need to know is that nameservers are two or four lines of text that are provided by your web hosting and you have to add these lines in your domain control panel. nameserver lines look something like given below;
ns1.xyz.com
ns2.xyz.com
You need to copy the namesevers provided by your hosting provider and then add them to your domain control panel.
How can I get the nameservers from my web hosting company?
Generally every web hosting sends nameservers in the welcome email after you signing up for the hosting.
If you don’t find nameservers detail in the welcome email, simply contact your hosting support and they will give you the nameservers detail for sure.
Setting up Name servers for GoDaddy
GoDaddy is the largest domain registrar and in this guide we tell you how to setup hosting name servers in GoDaddy domain control panel.
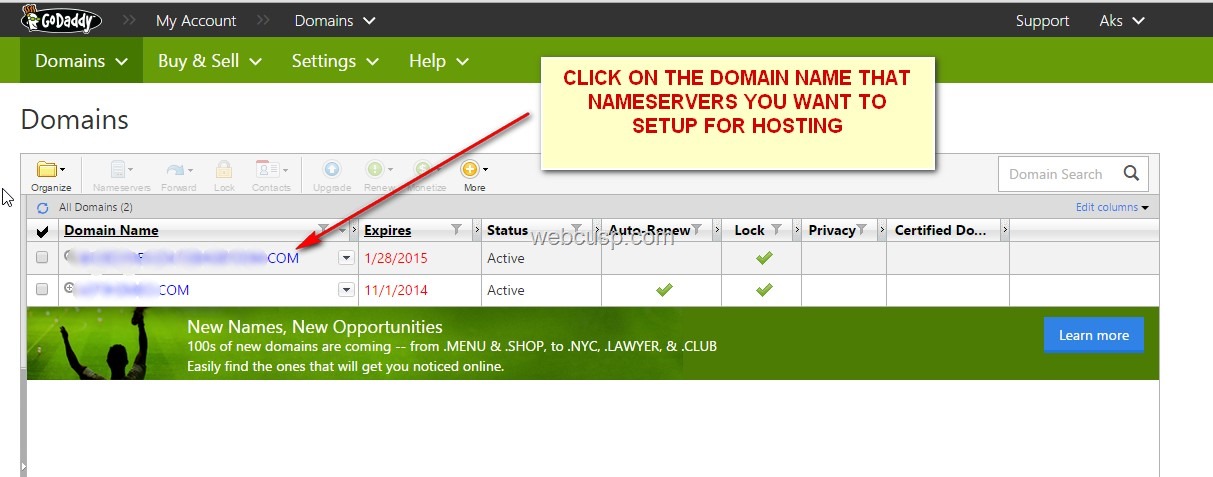
- First of all, get logged in in your GoDaddy account and go to domain control panel
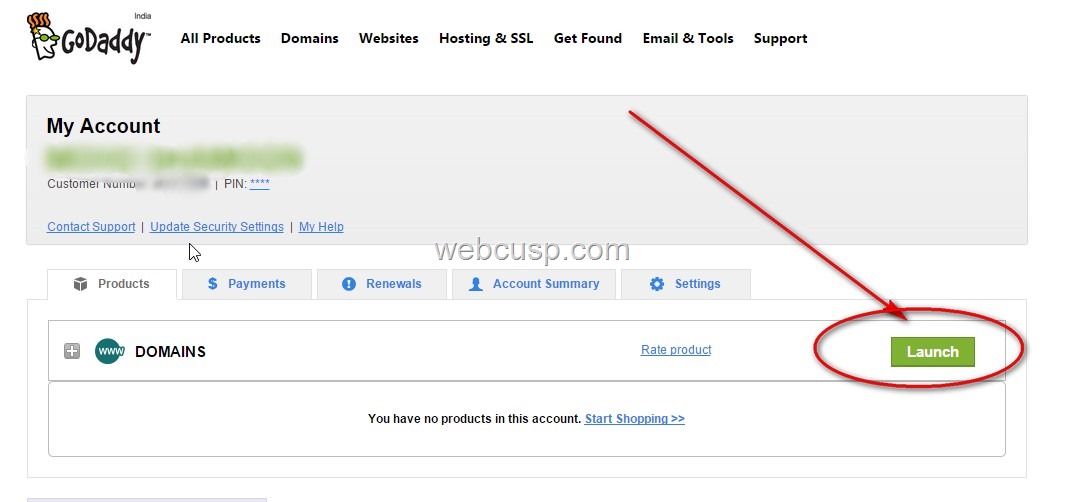
- Select the domain that name servers you want to set up
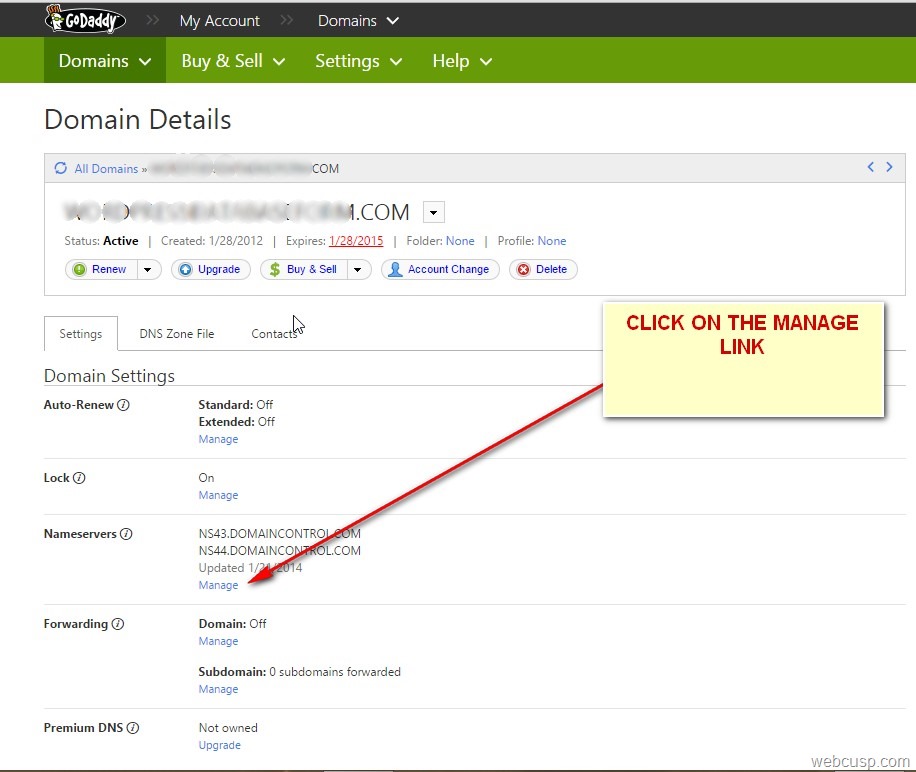
- Click on ‘’”manage nameservers”
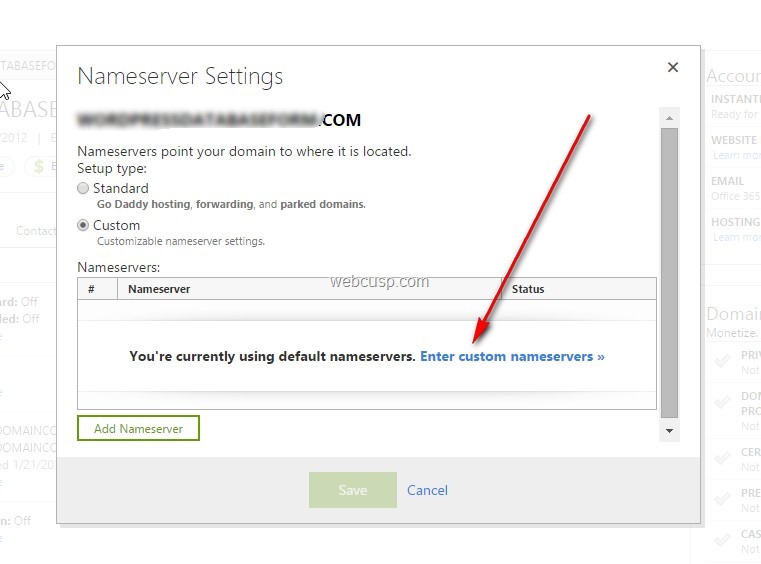
- In “nameserver settings”, check the box “custom”
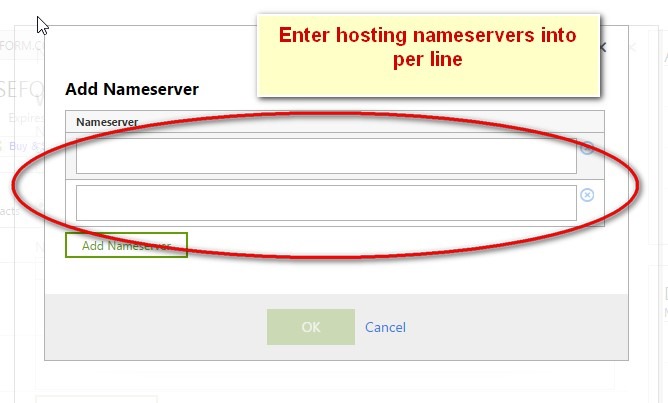
- A custom nameserver box will be appeared. Add one nameserver per line
Setting up Nameservers for Namecheap
- Sign in to your Namecheap account
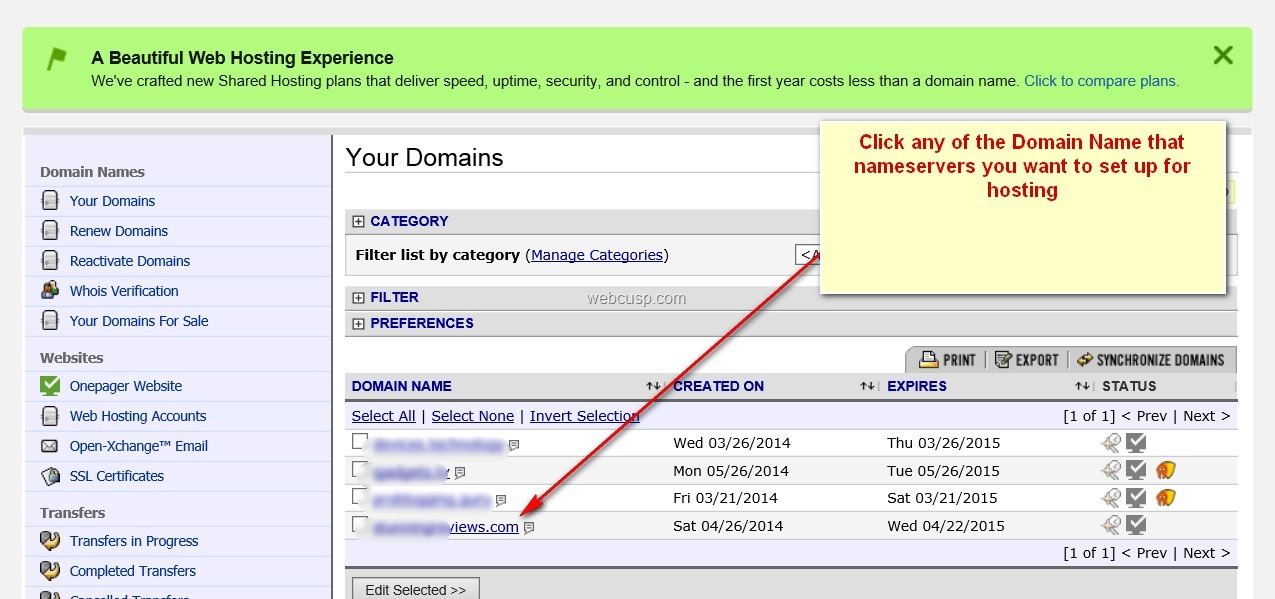
- On account dashboard page, at left vertical menu bar, click on “your domains” link. It will display all your registered domains
- Click on the domain name whose nameservers you need to customize
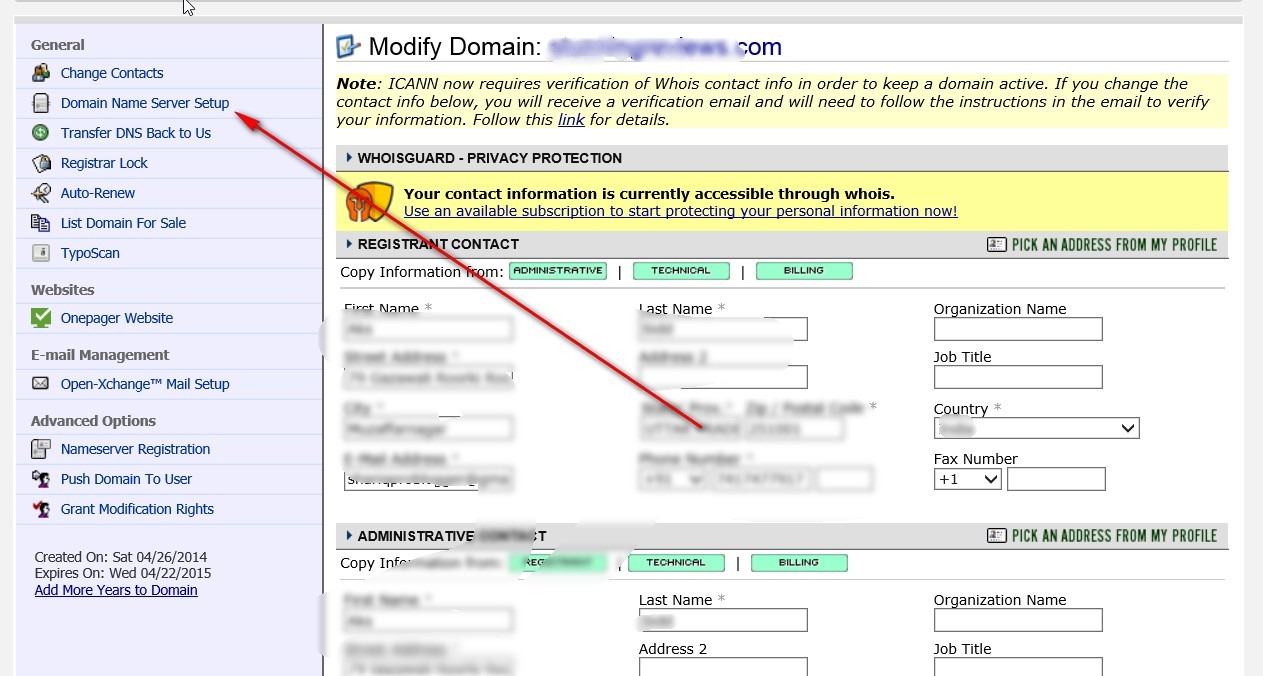
- Again at left menu bar, click on the link “Domain Nameserver Setup”
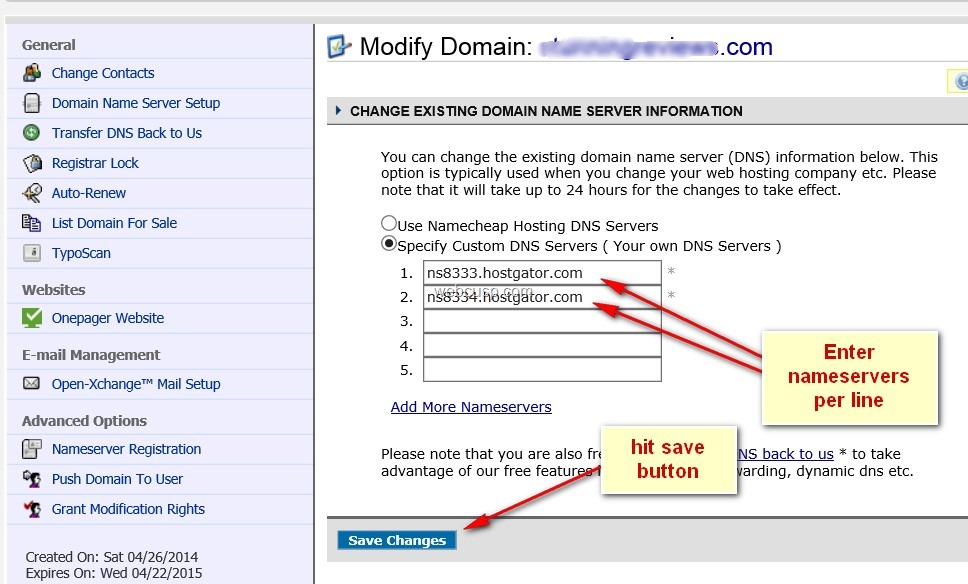
- On the next screen, you will see two options for nameserver setup; 1.Use Namecheap Hosting DNS servers 2.Specify custom DNS servers
- Check the box “Specify custom DNS servers”
- Add one nameserver per line and save the settings
How to setup hosting nameservers for a Domain managed via Bigrock
- Login to your Bigrock account
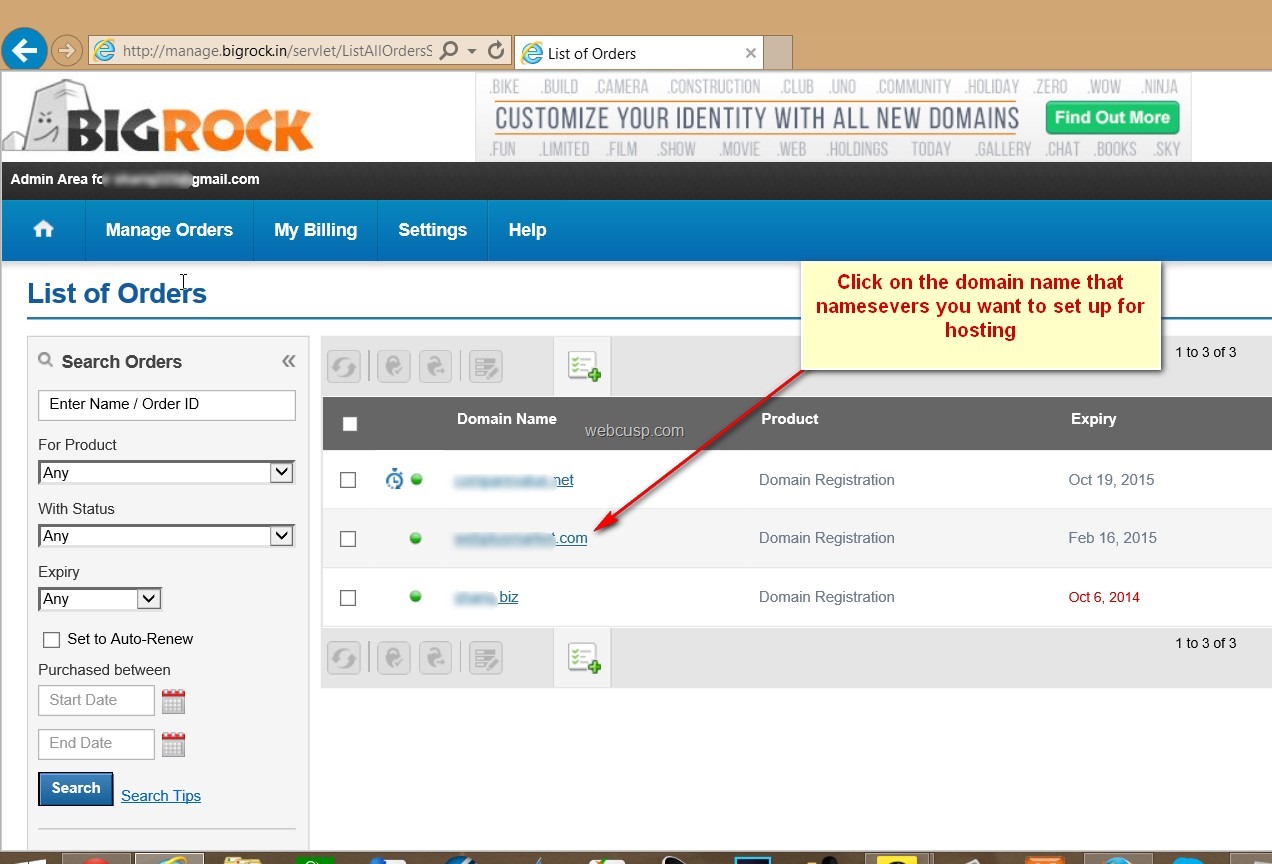
- On account page, in menu bar hover the mouse over “Manage Orders” and then click on the “List all orders” in dropdown menu. It will display all your registered domain in Bigrock account
- Click on the desired domain to change its nameservers
- Click on “name servers” and then add your hosting nameservers per line
This way you can setup your web hosting server with your domain name.
Alternative way to connect your domain to web hosting (for advanced users)
Note – On using this method, you will not be able to add sub domain in your hosting control panel
If, for any reason, you don’t want to connect domain with hosting via name servers or you have issues adding nameservers to domain, you can bypass above given method. Here is another working method to point your domain to your hosting
- Open the domain control panel and go to DNS manager
- First of all make sure that you are using domain provider default nameservers (for instance, in GoDaddy set namesevers to “standard”)
- Browse DNS records and create an A record with following detail
name/hostname – @
address / destination – IP address of your hosting server
TTL – 14400
If you find an existing A record with name @, then simple edit it and the IP address of your hosting server. You can find out your hosting IP address in the welcome email sent by your web hosting company, by asking support, in hosting control panel.

